I’m so excited to finally be able to share some of the wedding projects with you! Some of them I started working on almost six months ago, but I didn’t want to post about them until after the wedding for fear of spoiling some of the details for our guests.
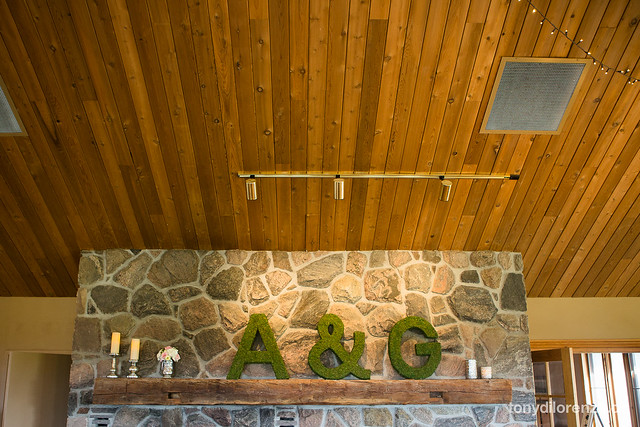 The first project I’m pumped to share with you are the moss covered letters that I made for the large mantel in the main room. The fireplace as this great stone front and a rustic barn beam for the mantel, and it was just begging for something big and bold to stand out against the neutral colours. I decided on bringing the outdoors in with the moss covered letters, and then adding some sophistication with large pillar candles on mercury glass stands, mercury glass hurricanes and mercury glass vase with the throwing bouquet nestled inside.
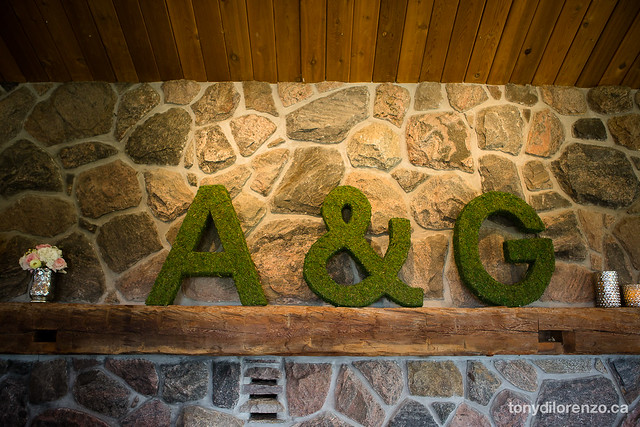
The reason I wanted to do the moss letters, is that there was so much green outside, with the windows on the opposite wall looking out over the horse jumps. This was a way to bring some of the outdoors inside. It made a big impact and was able to be made ahead of time, which was great when we had so many DIY projects that had to be done leading up to the wedding.
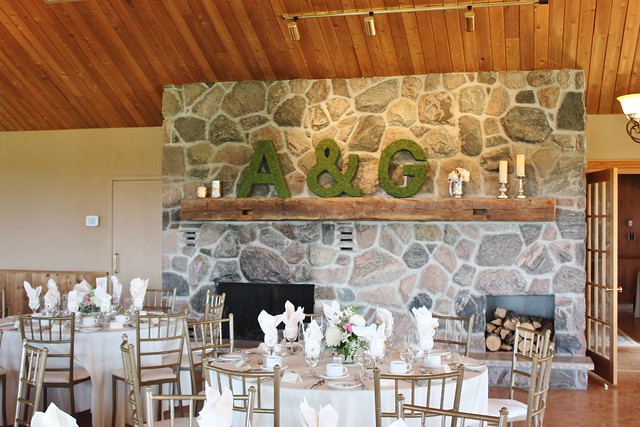 Here is a photo after we rearranged everything a bit and swapped the flowers with the candles. I think it was much more balanced than in the first photo.
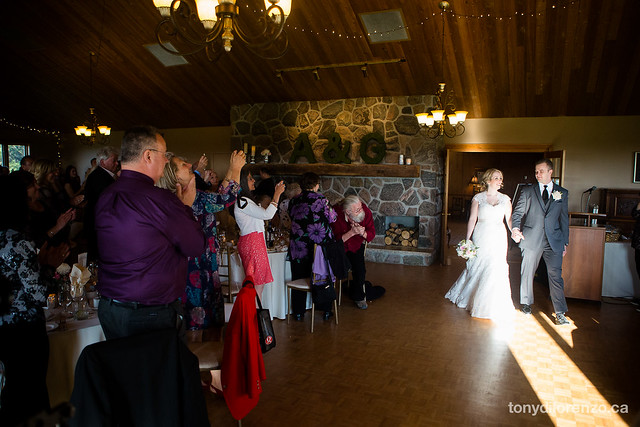
I love seeing little glimpses of it in some of the photos, like this one when we made our entrance before dinner.
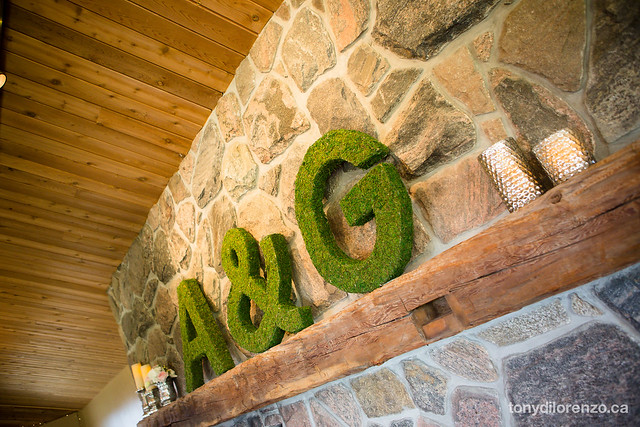
We got lots of compliments on them and people couldn’t believe that we’d done it ourselves. They would never know that they were just cardboard, lots of masking tape and a little moss.
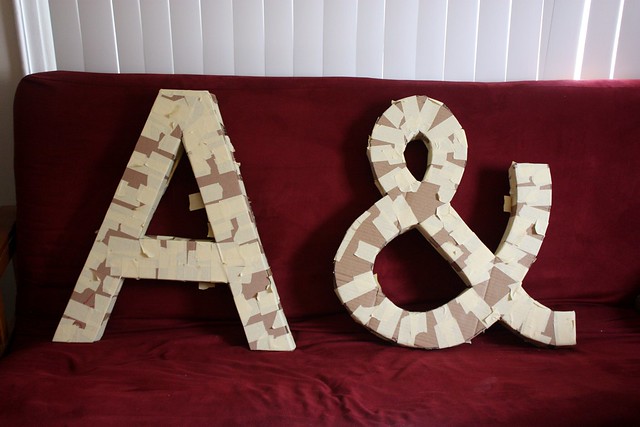
If you can find premade cardboard letters at a craft store, then use them, but I couldn’t find any that were large enough scale for the mantle, so I decided to make them. Making the letters was the hardest part of this project and the most time consuming.
- I printed off a copy of the letters in the font that I liked and then used that as a template to roughly draw the design on a big piece of cardboard. I made the letters about 24″ high. Looking for large pieces of cardboard? Find out when your local dollar store gets their deliveries and they’ll usually give them to you because it means they don’t have to spend the time putting them in the dumpster. A win-win all around.
- Cut out the shape of each letter and then used that to trace it onto another piece of large cardboard to make the back of the letter. You need an identical front and back for each letter.
- Cut strips of cardboard for how deep you want the letters to be. Mine were about 2″ deep.
- Use masking tape and sheer willpower to get the strips of cardboard to bend and flex to match the shape of the letters. Attach the strips to the front and then to the back.
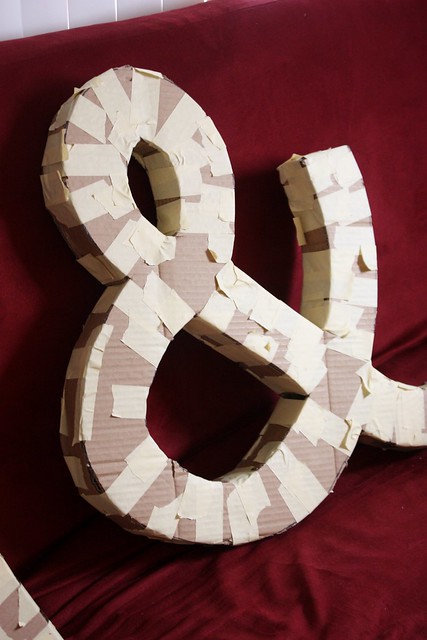
I finished the “A” and “&”, then Garrett came home and said “why didn’t you just cut them out of styrofoam”. Duh. Where was he hours ago when I started this whole process?
So in hindsight, I could ahve stryrofoam letters, but I’d like to say that maybe I chose the cardboard because I was able to recycle it. It makes me feel better about spending hours making cardboard letters (while catching up on TV shows though, so not a total loss).
If you go the styrofoam route, I’d draw your letter design onto a big piece of styrofoam and then use an electric carving knife to cut the design out. I remember doing this for a school project years ago (the Hollywood Sign! see, I was a film buff even back then). Keep in mind that it is VERY messy cutting styrofoam. You’ll have little pieces of it everywhere, so have a vacuum at the ready.
Ok, so you’ve got your letters made (cardboard or styrofoam) and now you need to make them mossy. I originally started to paint my letters with green craft paint, thinking that you’d be able to see the cardboard through the moss, but you really couldn’t. I only painted the back and about an inch of the side edges, just in case it was peeking out. If you went with styrofoam, you might want to paint it all anyway as the white of the foam could stand out more than cardboard. Hold up a piece of the moss to the styrofoam first to see and save yourself the time painting it if you don’t need to.
 My mom was able to pick up two of these rolls of preserved moss from Joanns for around $20 (normally $16.99 each, but they let her use a 40% coupon on both of them. Score!). Each roll was 18″ x 48″ and it took every last scrap of two of them to make the three letters and cover a small box that I used in the display of the favours.
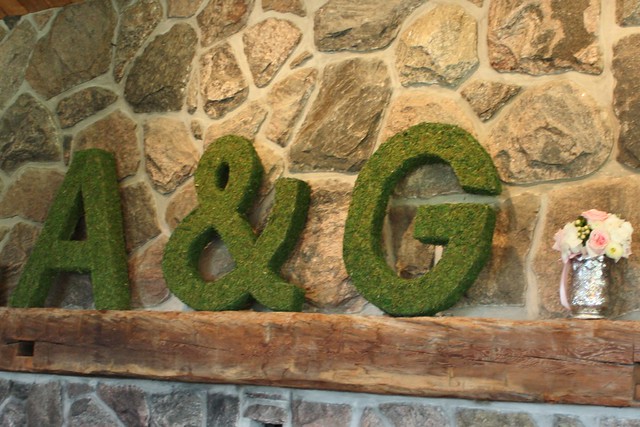
- The moss has a mesh backing to it, which made it easy to cut. I measured the straight pieces of the “A” and cut pieces that fit those accordingly, but for the “&” and “G”, I had to get more creative with the cuts. They were actually a patchwork of pieces, but you couldn’t tell because the moss blends in so well.
- I also cut strips of moss 2″ wide to cover the sides. It was just a matter of starting at one side of the letter and continuing all the way around.
- I used a hot glue gun to adhere the moss to the letters and the only downside to that is all the spiderweb-like hot glue gun strands that get everywhere. Use a pair of small scissors to snip them all after you’ve glued down the moss.
- There were a few spots where you could see the edge of the backing, like on the sharp corners of the “A”. You’ll have little tuffs of moss that fall off when you’re cutting it, so set those aside and use them later on to “blend” the edges of the backing. It just took a little glue and a few tuffs of moss to make the edges less square.
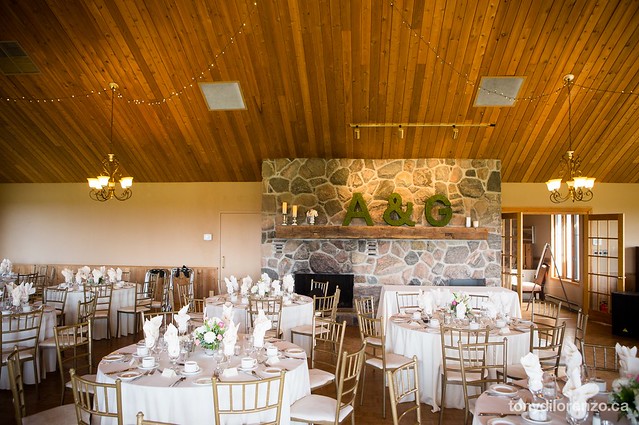
To put them up, we propped them against the back wall of the fireplace. The “G” kept trying to roll away, but Garrett had a brilliant idea to take some small stones from outside and use those to balance the “G”. It worked – and nothing rolled away!
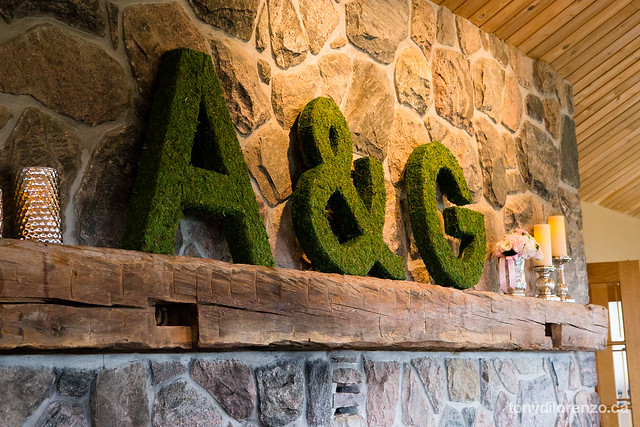
After the wedding, my mom and I were able to rip the moss off fairly easily and save it to use for other projects later on, although part of me would have loved to hang them up in the apartment. Maybe I’ll use the leftover moss one day to make a smaller version!

Thanks for sharing. I love your ideas! Beautiful.
Looks great! What font did you use?
Thanks Jillian! I think it was Arial.