• About
  • Contact
  • Advertise
  • Privacy Policy
  • Copyright & Disclosure
  • Subscribe
    • Bloglovin
    • Facebook
    • Instagram
    • Pinterest
    • YouTube

Life at Cloverhill

  • Main
  • Home & Garden
    • Cloverhill Farmhouse
    • January Declutter Detox
    • Cleaning & Organizing
    • Gardening
    • Our Backyard Chickens
    • Previous Apartments
  • Holidays
    • FREE Online Christmas Planner
    • Holiday Decor
    • Holiday Recipes
    • Holiday Projects
    • Holiday Gift Ideas
    • Holiday Organizing
    • Holiday Activities
  • Recipes
  • Create
    • Printables Vault
    • Everyday Projects
    • Seasonal Projects
  • Family
    • Baby
    • I Do
    • Travel

Christmas Craft Tutorial Holidays

Tutorial: Homemade Felt Stockings

One of my favorite traditions growing up, was digging into our stockings on Christmas morning to see what goodies Santa had left us that year. I was lucky that I had two December-born siblings because our stockings were actually the ones that they put the newborns in when they hand them to their mothers. These things can seriously hold alot (who knew that a newborn could be so big?). Thankfully my mother sweet talked the nurses into giving me one of my own (I was four years old and cute…who could say no?).

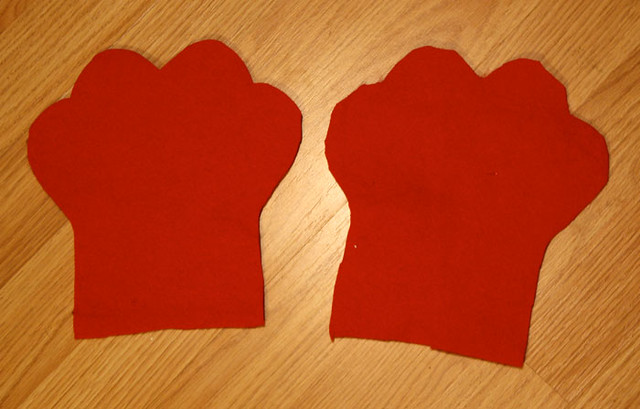
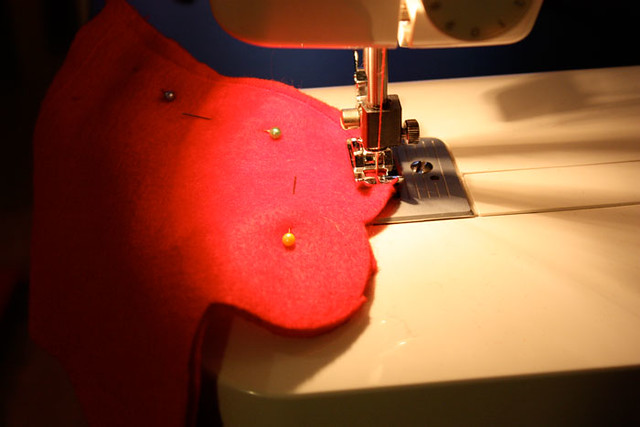
Now that I have a place of my own, I like to make little felt stockings to decorate with and fill up to give as gifts. This is a basic guideline of how you can make your own simple felt stocking, that you can alter to make as big as you’d like. Or as little too – why not make a bunch of little ones, have the kiddies decorate them and put them on your tree?

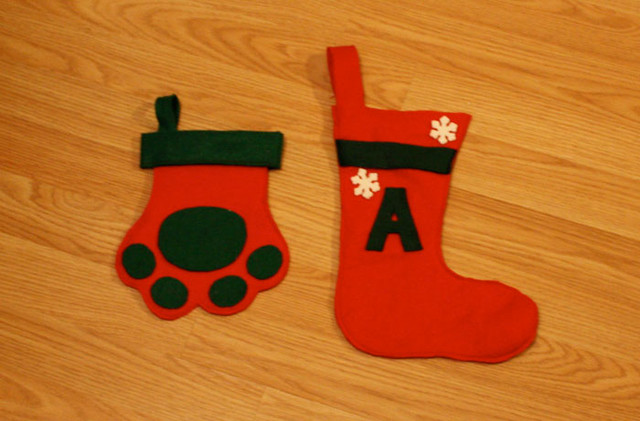
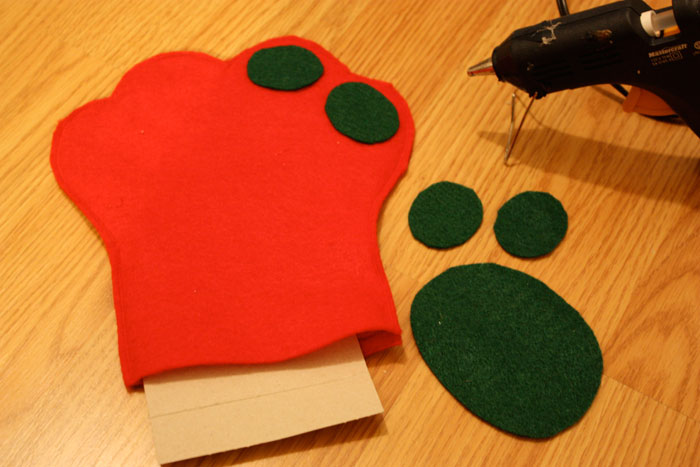
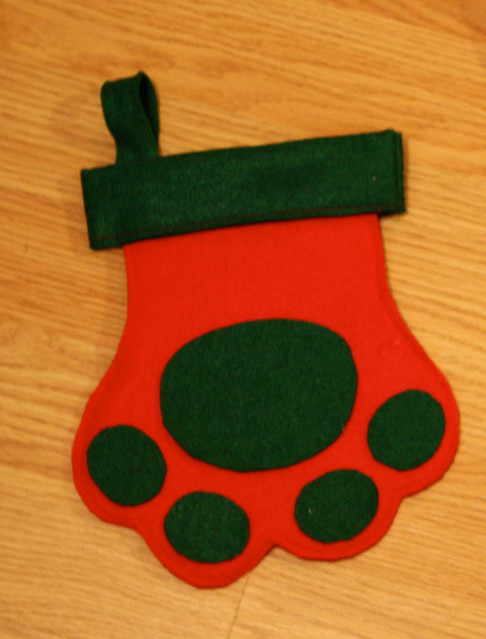
 This year I’m making a paw print stocking for the newest addition, Whiskey.

Cut two identical pieces of felt for the main part of your stocking. I made a rough template out of cardboard and used it to cut the first one out, and then used that one to cut the second one. Its okay if its a bit rough because you can trim it when they are stitched together. Make sure that you make the opening big enough for you to be able to put something in it!

Pin the two pieces together, and then stitch around the entire stocking 3/8″ from the edge, leaving the top open. When that is done, you can trim away any wayward strands of felt.

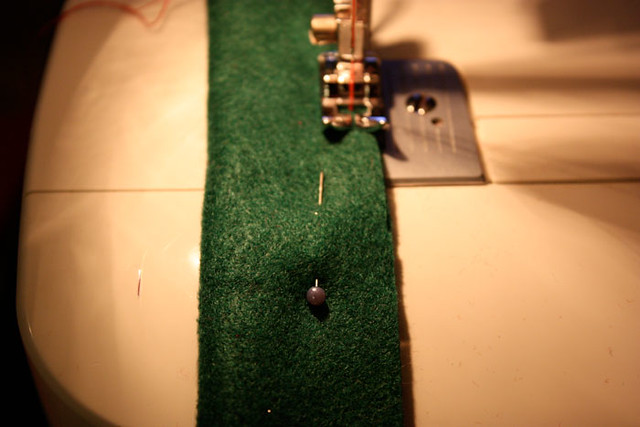
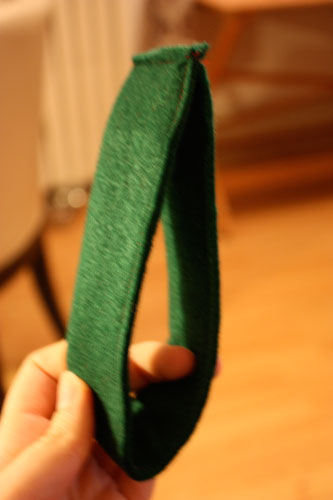
To make the cuff of the stocking, cut a 3″ strip of green felt that is twice the width of the opening, plus 2″. Fold the strip in half lengthwise and pin in place. Stitch the length of the strip, 3/8″ in from the edge.

Stitch the two ends of the cuff together, like in the fuzzy picture above. Set aside. (Sorry I have a cold and apparently it’s destroying my ability to focus my camera).
Take your trusty hot glue gun, and get ready to apply whatever decorations you would like on the stocking. Be sure to put a piece of cardboard inside the stocking to prevent gluing the two sides together. Get creative here! Cut out felt shapes and dig out the glitter, rickrack and feathers. For a kid friendly version, use white glue to prevent any burns.
(Again, another fuzzy photo. I’m seriously on Santa’s naughty list this year) Take the cuff, flip it inside out, so that the attached end is tucked in. Slip the cuff over the stocking and glue into place. Again, put a piece of cardboard in between to prevent any mishaps.
Cut a small strip of felt for the loop to hang the stocking up with, and glue in place. Now you have a finished stocking for the furry friends in your house.
To make the regular “human” stocking, you can use the same idea. Cut out two identical pieces of a stocking shape that you like, pin together and stitch around 3/8″ in from the seam. Place a piece of cardboard inside, and then get glue gun crazy. On this one I used pre-cut felt snowflakes from a craft store, and then cut an “A” and a stripe out of green felt. This one is actually from when I was at university and made them for all of my housemates at the time. We hung them all down the large banister in our big old house, and then hid presents in them leading up to our Christmas party.

  So there you have it, simple, fun and easy stockings!

Share this:

  • Click to share on Pinterest (Opens in new window) Pinterest
  • Click to share on X (Opens in new window) X
  • Click to share on Facebook (Opens in new window) Facebook
  • Click to email a link to a friend (Opens in new window) Email

Related


« Gift Ideas for Her
Gift Ideas for Kids: The Gift of Reading & FIRST EVER GIVEAWAY! »
Hi, I'm Amanda! Join me as I make my family's 1903 farmhouse into a home. I share renovations, DIY projects, recipes, our flower farm and the joy of living in the Canadian countryside
More About Me

Archives

Categories

Copyright © 2025 · Divine theme by Restored 316

Copyright © 2025 · Divine Theme on Genesis Framework · WordPress · Log in