I’m so excited to finally be able to show you the finished bathroom! We didn’t do anything major, but using $20 (and some elbow grease) we were able to transform our little apartment bathroom from a white unpractical hole in the wall, into a cute, cozy and functional space in our home.
(Please note that I’m having some difficulties with the new photo editing software I’m using, so the colour and contrast is all off in these photos. Hopefully I can fix it soon!)
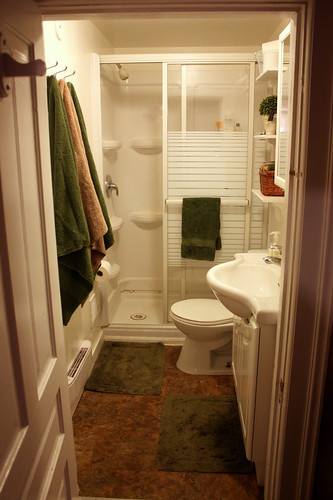
Our bathroom may look small, but we can easily move around in there (and even both brush our teeth at the same time), which suits us. I was able to make the hooks and shelving on the walls for under $20 using materials I found at hardware stores, dollar stores and my dad’s scrap wood pile. By adding these little things (and organizing the existing storage) our bathroom is much more functional
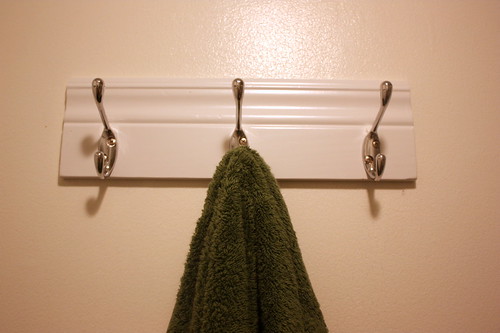
To make the bathroom hooks, I first found some silver metal hooks at the dollar store for $1.25 a piece. Sold. They matched the other hardware in the bathroom, which was perfect and saved us from having to find more expensive ones at the hardware store.
For the base, I found a piece of wood trim my dad had lying around in his garage. It was about 20 inches wide which was perfect for screwing into the studs in our bathroom wall, to ensure that it would be safe and sturdy for heavy wet towels.
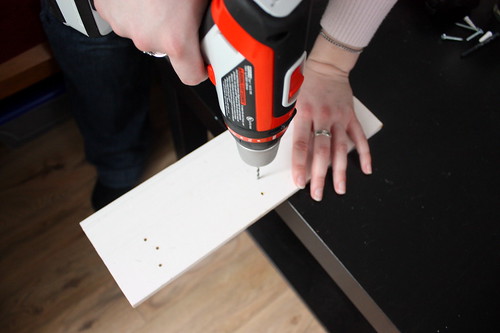
I took the piece of trim and marked when I needed holes to screw into the studs/wall and where I wanted the hooks to go. I drilled some holes to make it easier to install when it was ready and to prevent the wood from splitting.
After the holes were drilled, I gave it a light sanding and set to work spray painting several thin coats, making sure to get the sides as well.
The install was super easy. I drilled holes in the stud/wall for my anchors, as well as a little bit for the hook screws. Then I screwed right through the board into the anchors with my longer screws. For the hooks, I screwed right through the board and into the wall slightly to give a strong hold. The stud screws were slightly visible above the hooks, so I used a little white paint to hide them.
After letting everything set for awhile, it was time to test out the hooks. They worked great! Everything is safely secured to the wall and now I don’t have to come home to towels fallen on the floor.
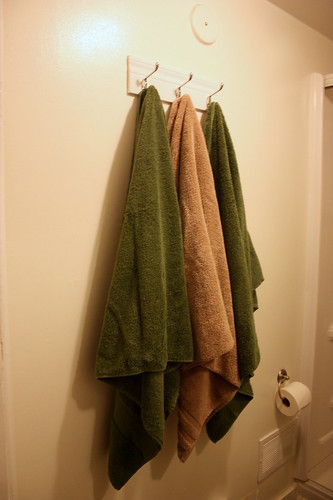
The only thing we have to keep in mind is that the baseboard heater is below, but we make a point of not turning it on unless we’re just warming up our towels while we’re in the shower. This actually turned out to be a nice inexpensive towel warmer too!
Bathroom Towel Hook Breakdown:
Hooks (3 x $1.25) $3.75
Wood Baseboard Free! (From my Dad’s scrap wood pile)
Spray Paint Already had
Screws & Anchors Already had
Total Cost = $3.75
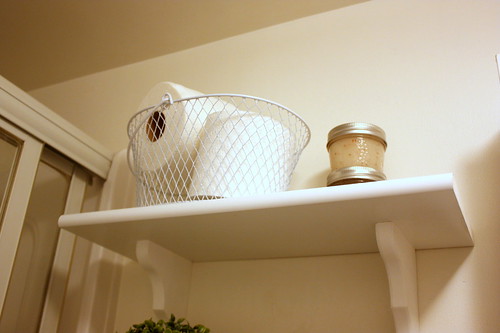
The bathroom shelves we made are still looking great. I still can’t believe that I made all three of them for $12, when just one was about $15 anywhere we looked.
The new addition is this cute white wire basket from the dollar store, which is perfect for storing extra toilet paper. The little mason jars to the right are my aunt’s yummy homemade scrubs. I want to find some more cute jars for bathroom products to go up there.
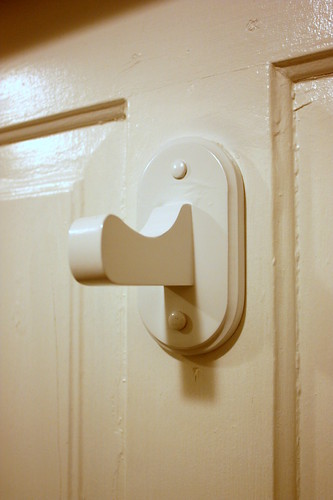
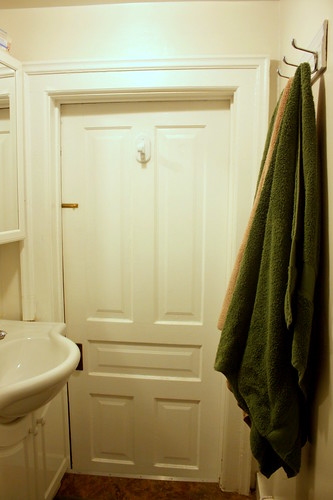
The last thing I wanted to fix was this awkward wooden knob on the door, where we used to hang up our towels.
The honey colour didn’t match anything else in the apartment, so I knew it had to be changed.
A little bit of spray paint and it looked brand new! I was able to unscrew it and take it outside to do this, which saved me from having any drippy spray paint.
Now our bathroom feels much more cozy and functional. The towels don’t come out much more than the door frame, so you hardly notice it when you walk in. Much nicer than having them always hanging on the door for the world to see. You’ll also notice I added a toilet paper holder on the left ($10 from IKEA) because the old one was in under the sink, making it next to impossible to reach.
The last little project we’re thinking of doing is a small distressed sign above the bathroom hooks to hide that rusty old cover near the ceiling. I figure this is a good summer project we can tackle one evening.
Linking Up To:
– – –
Tips & Tutes @ Home Stories A to Z
Cowgirl Up @ Crafty Texas Girls
Show and Share @ Southern Lovely
What I Whipped Up Wednesday @ Sugar and Dots









Wait. That basket came from the dollar store? Dollarama? I have got to keep my eyes open. That is so stinking cute!
I actually got it from one of the new Dollar Tree stores in Canada. They also had it in turquoise (which I grabbed too), yellow and red.
Amanda,
It looks great! I truly believe little changes can make a big impact. Great job!
Also, wanted to let you know that I have nominated you for the Liebster Award. You can view the details on my blog, http://simplylkj.blogspot.com
Congrats!!
Wow! Thanks Lauren! That is so sweet of you. I’m an touched that you would think of me 🙂 And now I get to pass it on to 5 other great bloggers. Thank you!
Looking fabulous. I love how you made that piece of molding into a towel rack!
And I dunno what it is with spraypaint but I keep running into home blogs that use it! Sure sounds much easier then the pot of paint and brush deal – something to look into once we get the keys to our new home and get started hehe.
Thanks!
Spray paint does make these so much easier and it leaves a clean finish with no brush storkes. But sometimes I prefer to paint with a real brush too. There is something nice about having a little more control over where the paint goes.
Congrats on your new house! When do you move in?
Your bathroom looks so cute. Love the shelves over the toilet. We did the same thing in our bathroom, and we love it. If you need more storage, something all small bathrooms seem to need, you could put a shelf over the bathroom door. That’s what we did. I put three baskets up there for extra rolls of toilet paper, cleaning supplies, and extra things like buy one get one free shaving cream, etc.
Amanda you did a terrific job! The hooks and shelves really look nice, and then softening it up with the textiles makes it look clean and contemporary.
I had to giggle when I read, “I first found some silver metal hooks at the dollar store for $1.25 a piece.” It should be the dollar 25 cent store! haha.
Thanks for sharing all your projects!