I’ve been lucky enough to grow up in an area where we often get snow for Christmas, and I love to bring some of those outdoor elements inside during the holidays.
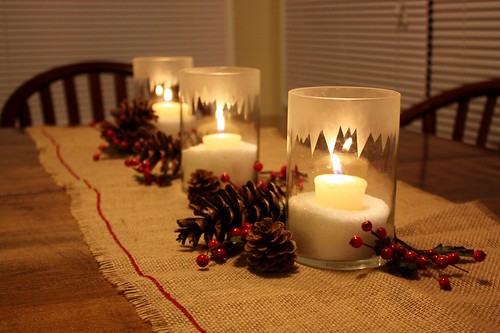
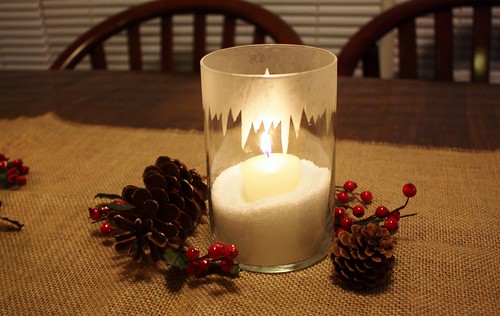
Using etching cream and epsom salt, I was able to create candles that look like they are nestled in among the snow outside. They give off the perfect glow in the evening, when we sit down for dinner.
What you’ll need:
- Glass Candleholders (I went with inexpensive ones from the dollar store)
- Clear Contact Paper (usually in the drawer liner section of a hardware store)
- Etching Cream (available at most craft stores)
- Small Paint Brush
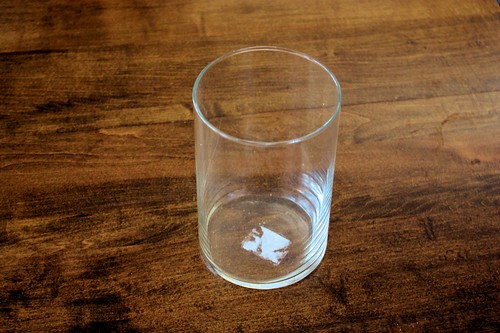
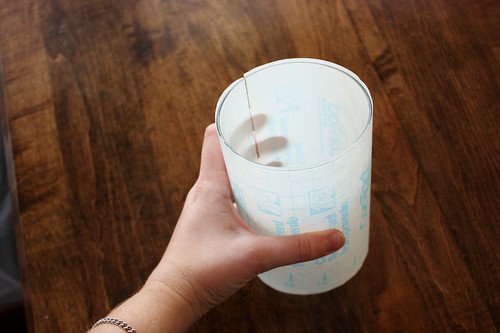
When choosing a candleholder, look for one that has straight sides and is easy to apply contact paper too. One with ripples, or waves in the glass will be difficult to get the results you’re looking for. Wash and dry your candleholders before starting.
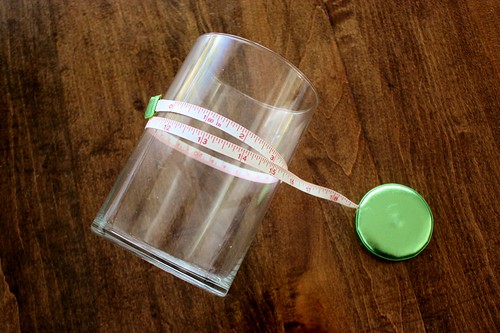
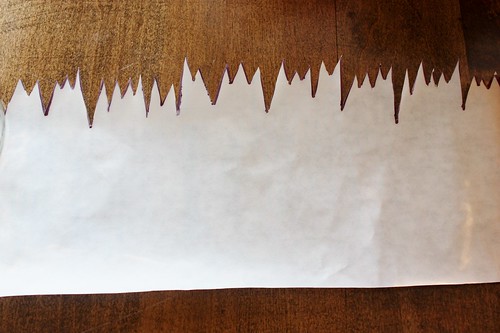
Draw your design on the contact paper and cut the area off that you want etched. I wanted icicles dripping from the top edge of the candleholder, so I cut that area off.
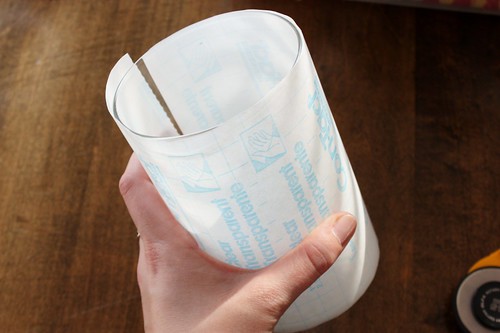
Remove the paper backing of the contact paper and adhere the sticky side to the candleholder, lining up the bottom edge of the contact paper with the bottom of the candleholder. Make sure to press out any air bubbles, especially around your design. Anywhere that there is a bubble near the edge, etching cream can get in there and ruin your design.
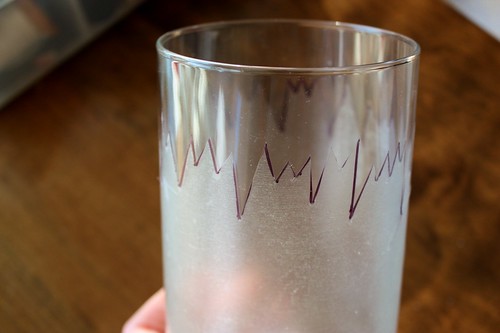
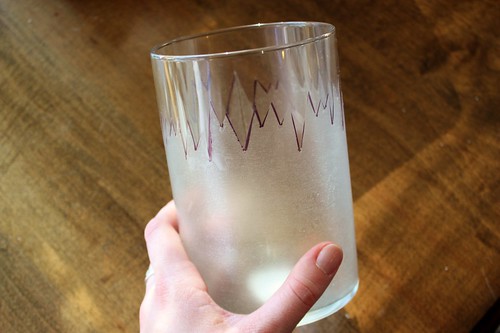
Apply the etching cream on the exposed glass surface, using a small paint brush to get into all the areas of your design. Don’t be afraid to lay the etching cream on thick to ensure that it is thoroughly covered. Let the etching cream sit for 20 minutes and then wash off with warm water and dish soap. After you’ve dried the candleholder, you might find some spots that you’ve missed, or that didn’t have enough etching cream on them. You can reapply to those spots with a small paint brush and repeat the etching process.
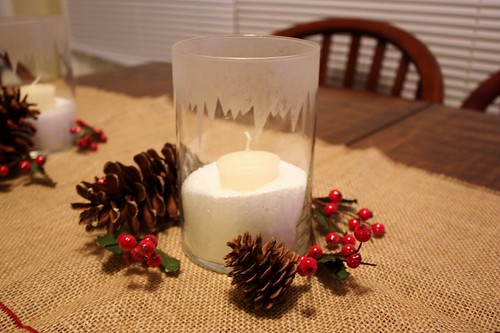
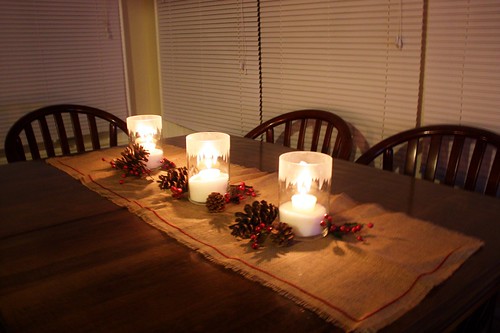
To make the snowdrift candles, pour epsom salt into the dried candleholders and nestle a candle inside.
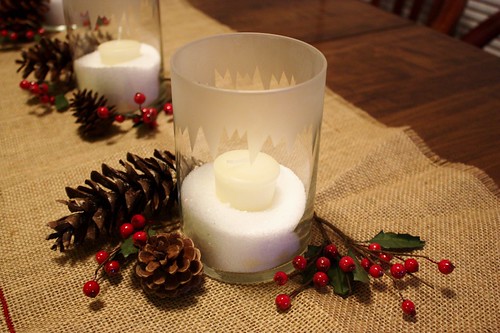
To add a little more colour to the holder, I placed pine cones and berries in amongst the candleholders.
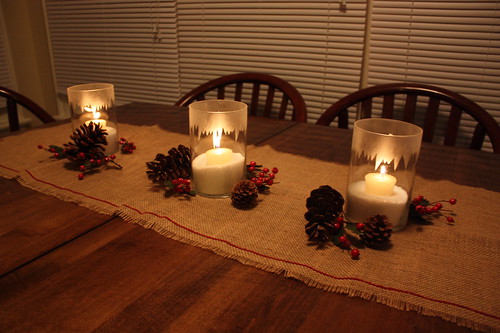
I made three candleholders to go across our dining room table, and added a burlap tablerunner to tie into the rustic look.
For an easy way to add a personal touch to inexpensive candleholders, give this a try. You can get creative with monograms and different designs, and create your own winter scene.
– – –
Linked Up To:
Hi SugarPlum – Christmas Cheer Link Party
Centsational Girl
Home Stories A to Z

It is a very nice idea.
Christmas is nearly even fun.
I want to gift a blessing from Japan.
Ryoma Sakamoto.
So cute! nice job. you make it seem very simple!
that’s just so beautiful and simple. visiting from a-z.