This post has been a loooong time coming. Five years ago, I bought the Greenleaf Miniature Village Set with the intent to make a cute Christmas village to put up for the holidays. My mom has always put up her ceramic village at Christmas and I loved the idea of having my own. I started this project before I had the blog, before I got Whiskey and before I’d even met Garrett – and I only just got it finished enough to display. I always pull it out in November to work on it, but get so sidetracked with holiday preparations that I’ve put it away unfinished every year.

There are still some little things to finish (like hanging the doors with the world’s smallest hinges and adding some “wallpaper” to the interiors), but I was so excited to be done enough to put it up this year. I put some of the buildings on books covered in snowy cotton batting to make them look like they’re up on a snowy hill, and then surrounded everything in evergreen trees.
For anyone who has thought about making one of these villages before, I’ll warn you that they are VERY labour intensive. They come in sheets of wood, clear plastic and cardboard. Nothing is already assembled.
What You Need to Make a Greenleaf Miniature Village Set
- Miniature Village Kit (O-Scale, 1:48)
- Craft Utility Blade (for trimming pieces)
- Sandpaper (Medium Grit and Fine Grit)
- Wood Glue
- Wood Filler
- Small Woodworking Clamp
- Craft Primer
- Craft Paint
- Craft Brushes
- Craft Glue
- Spray Clear Coat
- Miniature Christmas Trees
- Miniature Furniture (O-Scale, 1:48)
How to Assemble the Greenleaf Miniature Village Set
- Pop the wood pieces for each building off the sheets.
- Sand all pieces with medium grit sandpaper. (I went through a ton of sandpaper for six buildings, but all that hard work was worth it to have a handmade village that my family can enjoy for years).
- Glue pieces together and secure with a clamp.
- Sand all pieces with medium grit sandpaper again.
- Use wood filler on holes, allow to dry and sand smooth.
- Prime all pieces, allow to dry and sand smooth with fine grit sandpaper.
- Paint each building, allow to dry and sand smooth with fine grit sandpaper. Repeat a final coat of paint.
- Carefully glue on windows and trim.
- Build the roof with cardboard shingles, and paint.
- Finish everything with two layers clear coat.
And as long as it took to make all the buildings, it was actually a very fun and therapeutic craft – especially all the painting. Anytime we popped a movie in this fall, I’d dig out the paint and brushes and got busy doing another layer on the schoolhouse, adding shingles to the store’s roof or touching up the trim on the Tudor home.
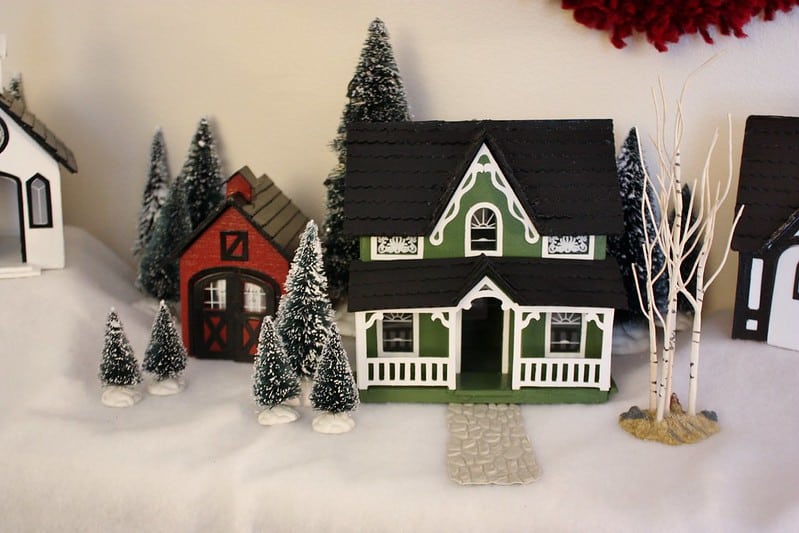
The Tudor home is one of my favourites – from the brown trim to the diagonal paned windows. It also gives a little sneak peak of what is to come.
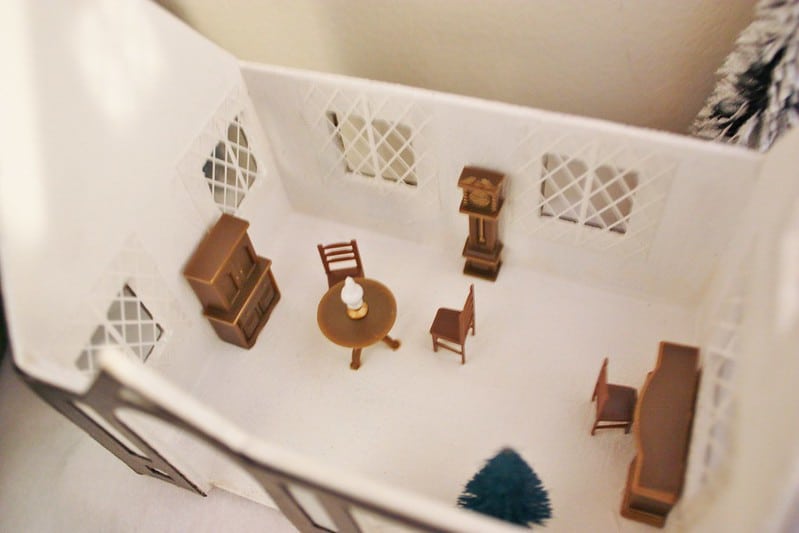
It’s the first building that has itty bitty furniture in it. The kit is O-scale or 1:48 (the same as most train sets) so it is much smaller than traditional doll furniture. It’s one of several kits that I bought from the Little Dollhouse Company in Toronto (one of the coolest shops in the city). My next step with these houses is to make “wallpaper” and “flooring” with scrapbook paper to cover the interiors.
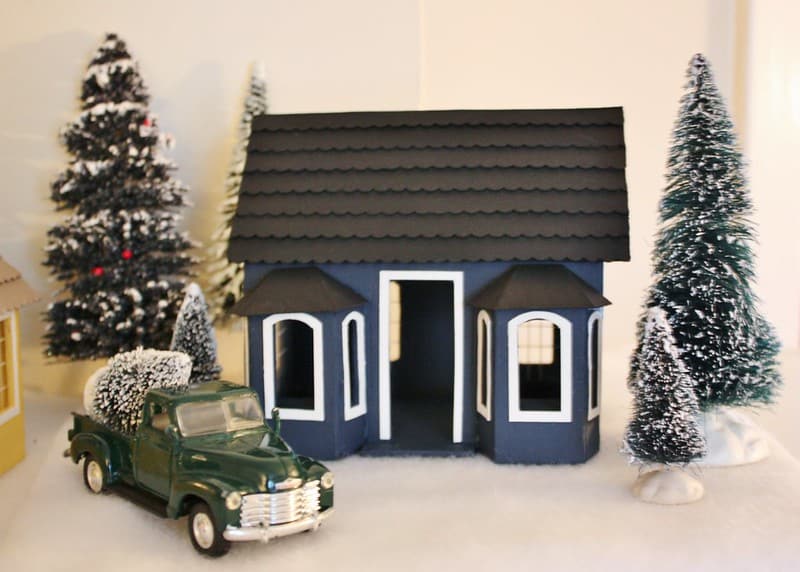
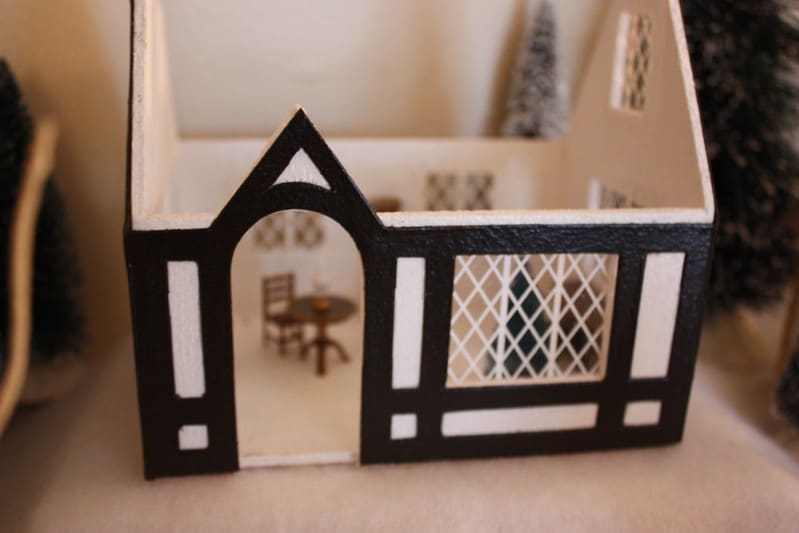
When I first started to build the village, I had the choice of wiring them for a lighted village or making them into functioning mini dollhouses, with opening doors and a roof you can lift off. I thought it would be more fun to have them as dollhouses, so that you can create little festive scenes inside. I’d like to find a way to add lights to inside of the roofs so that they light up from inside. This storefront (which still needs windows and a door), would look so cute with gifts stacked in the shop window.
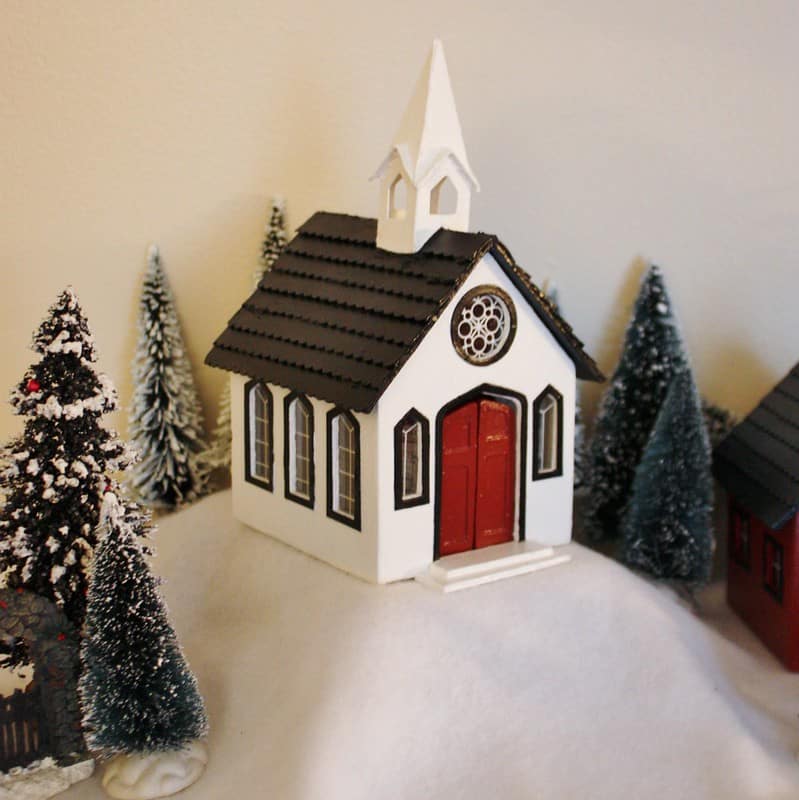
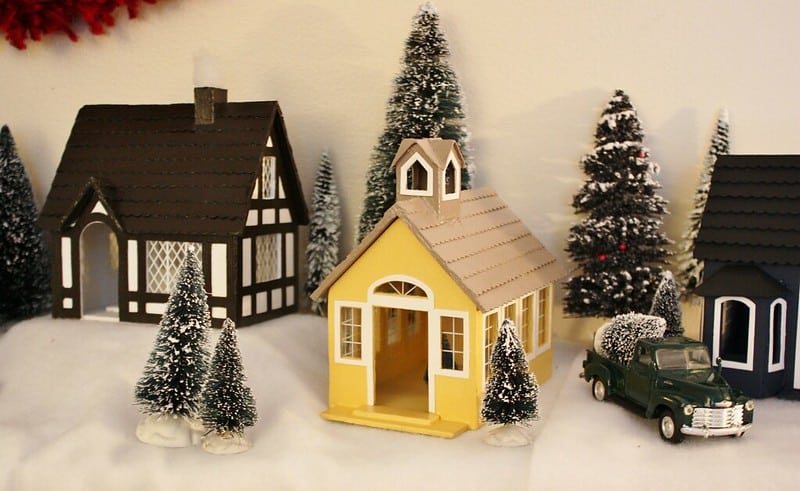
The church was one of the more difficult buildings – from all the cuts in the cardboard to make the bell tower to the delicate windows. I can’t wait to get the hinges on the red doors so that they can open up and maybe make some pews to add inside. You may have spotted it a couple of years ago I used the unpainted church roof on the schoolhouse building as part of the vignette I put above our kitchen sink.
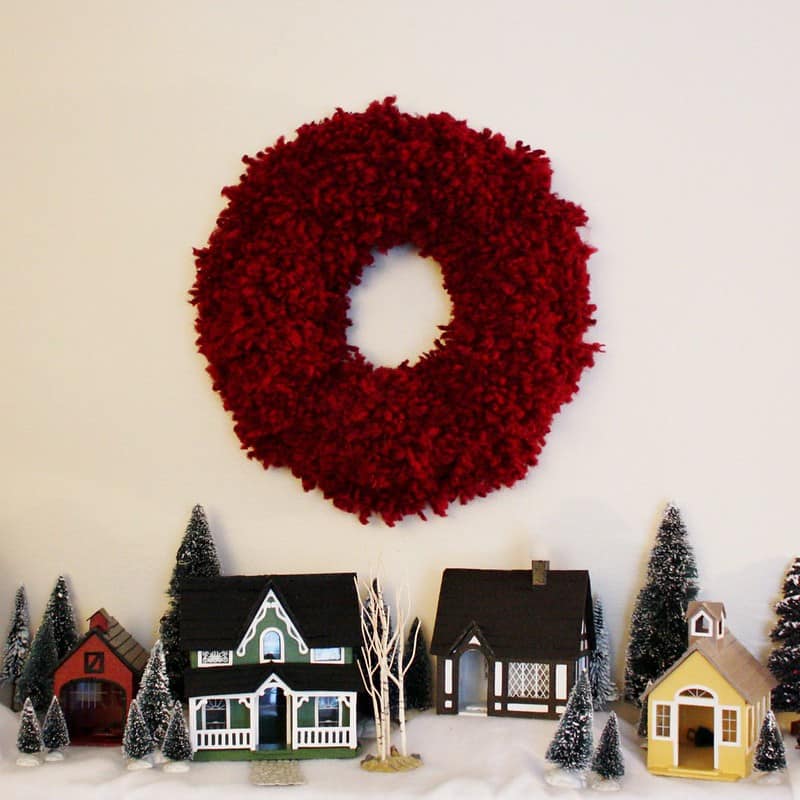
For now I have the six buildings, but next year I’m putting together an expansion pack of two more – a train station and another storefront. There are more kits such as a Miniature Pine Mountain Village and Miniature Greenleaf Town, that I can build to add onto my Christmas village, and I’m thinking about making one or two buildings a year until it is all done. It may take me a decade, and we’ll need a bigger bookcase, but it will be a lovely Christmas tradition that I can pass onto my own family someday.

This is completely adorable! Okay, I’ve just added this dollhouse village to my Christmas wish list. I live 5 mins from the Little Dollhouse Company – I might pop by tomorrow 😉 Love the idea of adding to it and handing it down to your kids. Well done Amanda! Happy holidays.
Oh how I adore miniatures! I am so impressed by the amount of work you put into your Christmas village – it looks AMAZING! So lovely!
Visiting from the Inspiration Gallery link party at Design, Dining & Diapers!
I absolutely love this idea. I followed the link to the Little Dollhouse Company website but was wondering if you had any suggestions for making sure that I’m choosing 1/4″ furniture (from the web… I live in North Carolina). Also, have you found any good sources good for Christmas-specific accessories?
Hello Amanda,
This village is beautiful! Did you add new buildings to it?
Gabriela
Thanks Gabriela! I have started a couple of them, but haven’t finished them yet. I’m hoping that when the renovations slow down on the real house, I can get back to my mini houses again 🙂
I love these houses! However, I cannot locate the kits on the link in you article. Can you please tell me where I can purchase these kits?
Hi Corrie – you can find them on the Greenleaf website: https://shop.greenleafdollhouses.com/miniature-buildings/ (I’ve also found them on ebay before too)
I also built this village. Unfortunately, I sold my home and the village (no room in the motorcoach). Reading your article inspired me and I want to build it again.