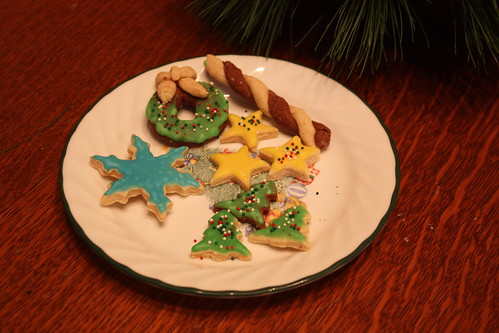
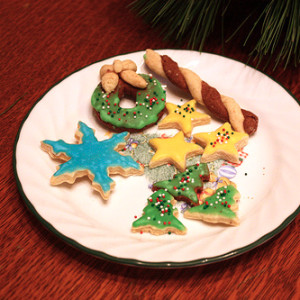
I’m actually not a big fan of sugar cookies – I’m more interested in having fun decorating them. But I like this recipe because it has a little bit of zing with some subtle spices. Plus they look fantastic on a cookie tray or set out for Santa on Christmas Eve. You can make them up to a month in advance and freeze them to have on hand when visitors arrive.
Last weekend my five-year-old cousin came to visit for her first sleepover at our place and we decided to make these cookies while wearing our new Christmas aprons. I was really glad that we did, because with all her “help” baking I was soon covered in flour and then blue icing. Oh to be a messy little kid again and not think about laundry.
Sugar Cookies
Prep time
Cook time
Total time
Author: Amanda - Life at Cloverhill
Recipe type: Cookies
Ingredients
- ¾ cup butter, softened
- 1 cup granulated sugar
- 1 egg
- 1 tsp vanilla
- 2½ cups all-purpose flour
- ½ tsp baking
Ppowder - ½ tsp ground nutmeg
- ¼ tsp ground cinnamon
- pinch salt
Instructions
- n a large bowl, beat butter and sugar until fluffy. Add in egg and vanilla and beat to combine. Set aside.
- In a separate bowl, stir together flour, baking powder, salt, cinnamon and nutmeg.
- Stir dry ingredients into the creamed mixture slowly,
in several additions. - If it goes a bit crumbly, add a few tablespoons of cold water and mix until it forms a nice dough.
- Divide the dough in half and wrap each half in plastic wrap. Put them in the fridge for about an hour or until they're firm.
- On a lightly floured surface, roll out each ball of dough until it is about ¼" thick. Use cookie cutters to make shapes and place on a greased baking sheet. Bake at 350F for 10-12 minutes. Keep in mind that smaller cookies take less time. You want them to be lightly golden on the edges. When they are done transfer them over to a rack and let them cool completely before you decorate.
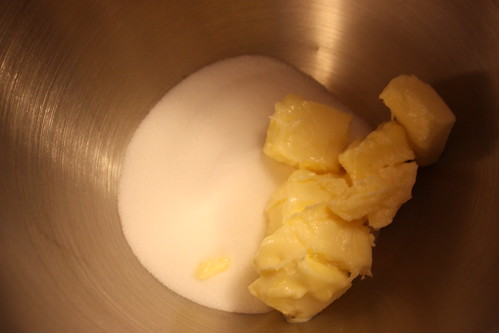
In a large bowl, beat butter and sugar until fluffy.

Add in egg and vanilla and beat to combine. Set aside.
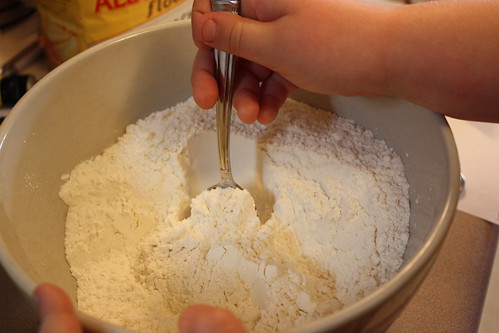
In a separate bowl, stir together flour, baking powder and salt. I let my cousin stand up on a chair to help with the stirring and she was quite enthusiastic. I think there may have been more flour on me than in the bowl.
Now, this is where the good stuff comes in. Add the cinnamon and nutmeg to the dry ingredients and combine. Spices make everything twice as nice. I would put spices on absolutely everything if I could justify it.
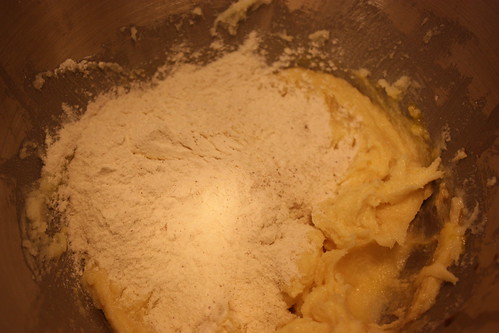
Stir dry ingredients into the creamed mixture slowly, in several additions. This will help make a smoother dough.
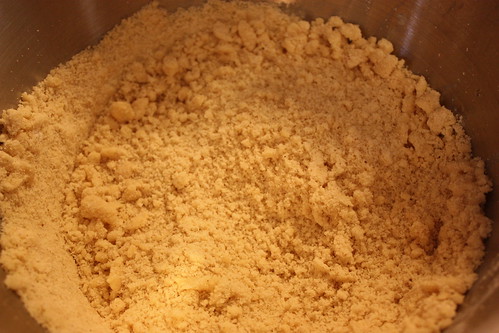
If yours goes a bit crumbly like mine is above, add a few tablespoons of cold water and mix until it forms a nice dough.
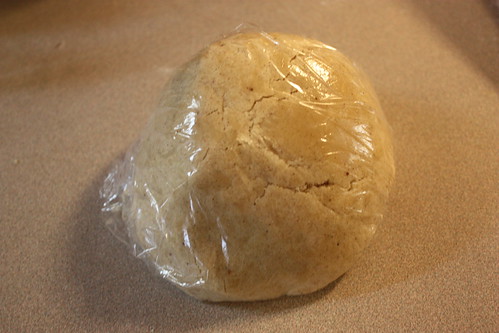
Divide the dough in half and wrap each half in plastic wrap. Put them in the fridge for about an hour or until they’re firm.
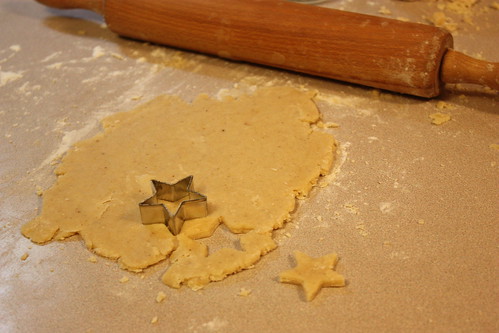
On a lightly floured surface, roll out each ball of dough until it is about 1/4″ thick. Use cookie cutters to make shapes and place on a greased baking sheet. Bake at 350F for 10-12 minutes. Keep in mind that smaller cookies take less time. You want them to be lightly golden on the edges. When they are done transfer them over to a rack and let them cool completely before you decorate.
Now its time to make the icing. This is a great icing recipe that dries hard and shiny while still keeping the vibrant colour.
Sugar Cookie Icing
Prep time
Total time
Author: Amanda - Life at Cloverhill
Recipe type: Cookies
Ingredients
- 1 cup confectioner's
sugar / icing sugar - 2 tsp milk
- 2 tsp light corn syrup
- ¼ tsp vanilla extract
- food colouring
Instructions
- In a small bowl stir together the confectioner's sugar and milk until its smooth.
- Beat in the light corn syrup and vanilla extract until the icing is smooth and glossy.
- Divide into separate bowls and add food colouring to get the colours that you like.
- You can dip the cookies in the icing, or paint them on with a clean brush.

Unfortunately this is the only picture that I have of the icing making process because I was busy keeping someone’s tiny fingers out of the bowl for “sampling”. In a small bowl stir together the confectioner’s sugar and milk until its smooth. Beat in the light corn syrup and vanilla extract until the icing is smooth and glossy.
Divide into separate bowls and add food colouring to get the colours that you like. You can dip the cookies in the icing, or paint them on with a clean brush. I sometimes make it a bit thicker by using more confectioner’s sugar, so that it can be spread with a knife. Or if you are five years old you can just stick your whole hand in the bowl and proceed to lick it all off. (Needless to say we had separate icing bowls)
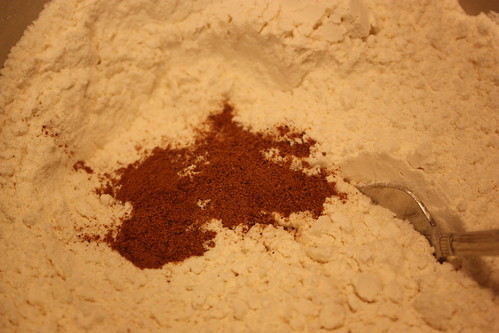
For half the batch I added a few tablespoons of cocoa powder to make chocolate sugar cookies. You can get really creative combining the two. And of course we had to use an astronomical amount of sprinkles. Now if you left this out for St. Nick I don’t think you’d be stuck with a lump of coal this year!

Oh shucks, I totally left you a comment and then closed out before I typed the captcha!
Basically I said the pics remind my of my childhood. Mom was always baking cookies! Feelin’ nostalgic :/