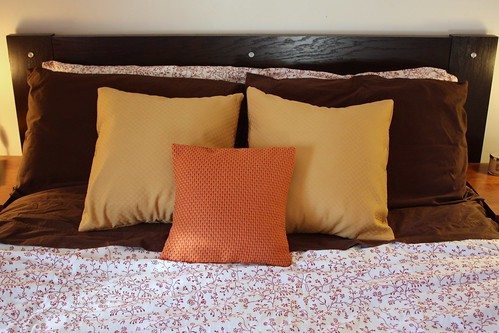
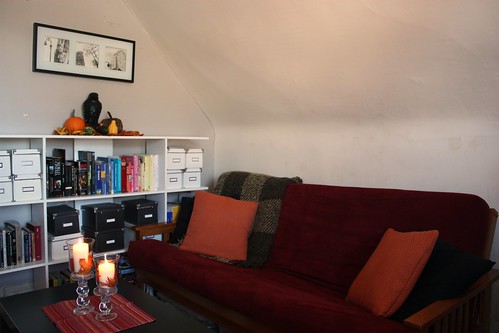
Over the weekend, I posted about the new cushion covers that I made as part of my Fall decor in the bedroom and living room to spruce up the house for Autumn and I thought I’d share how I did it in a quick and easy tutorial.
These covers are easy to whip up in no time at all and are a simple way to change things up in your home. Even Whiskey loves it when I change them up!
What you’ll need:
– Enough fabric to cover the pillow (see measurements in the next step).
– Scissors and Pins
– Sewing Machine and Thread
– Iron and Ironing Board
Measure your pillow. The pillow form I used was 20″ x 20″
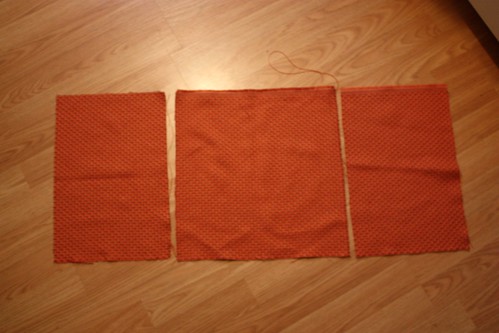
To make this cover I need to cut one square piece and two rectangle pieces. For the square piece, its the size of the pillow, plus one 1″ added on each length. So in this case the square piece will be 21″ x 21″.
For the rectangle pieces, they need to be the same length as the square piece on the long part. For the short part calculate half your square piece plus 2.5″. So for this pillow, the two rectangular pieces will each be 21″ x 12.5″.
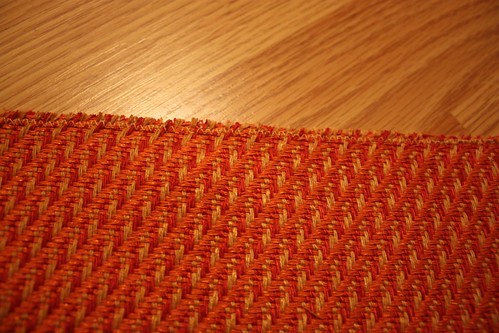
Iron all the fabric so that it is nice and smooth (be sure to use the correct setting!) To prevent fraying (especially on a woven fabric like this), use a zigzag stitch along the edge. You can also use a serger is you have one.

You need to make a nice polished hem on one long side of each of the rectangles, as this will be exposed. Fold over the edge by about 1/4″ twice, pin and stitch with a straight stitch. Complete with one long side on each rectangle.
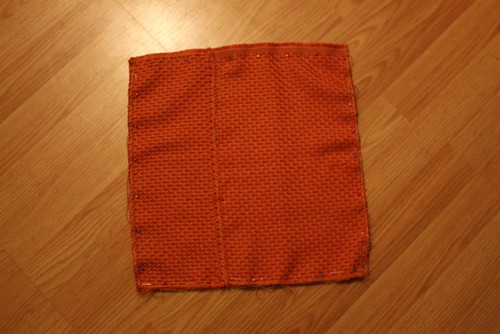
Now you are ready to pin the entire pillow together to be stitched together. Place one rectangle against one length of the square, with the good sides facing together. Pin in place. Place the other rectangle on top of the other long side with the good side facing inward and pin in place. The two rectangles will now be overlapping. Stitch all along the edge with a straight stitch, using a 1/2″ seam allowance.
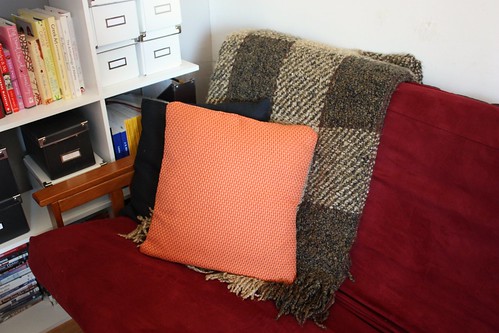
Now all you need to do is invert the cushion cover and stuff the pillow inside. Move it around, shake out the corners and get it all nestled in so that is looks right. There you have it, you’re done!
You can make as many covers as you like and change things up as often as you like. I’m already keeping an eye out for new fabric to make covers next month for the holiday season!
This post is linked up to:


Don’t even get me started on using the sewing machine. I’m beginning to think, it’s not meant to be….
😉
CUTE pillows!