
Today is the last day of the 10 Tasks in 10 Days Challenge and I have to say it was one of the hardest ones. So many steps and lots of waiting for things to be dry. It didn’t help that we were trying to put them up at 10:30pm last night while being quiet for the neighbours. But now that they are done I can see that it was so worth it to have easy access to all our spices.

We chose the Bekvam spice racks from IKEA because they were cheap ($7 CDN, $4 US) and we could stain them to fit perfectly in with our new darker kitchen. I used to have the metal Grundtal spice rack installed at the old apartment kitchen and it was great, but you were really limited to how many bottles it would fit on them. These new ones fit many more bottles for almost the same price.
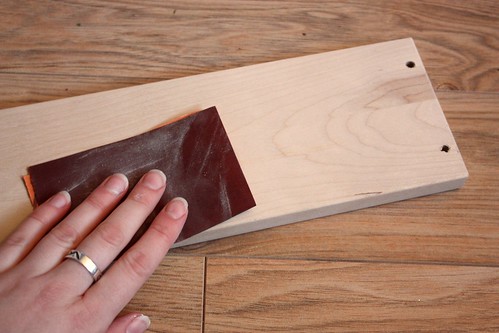
First I sanded down all the pieces with 400 grit paper.

Using my favourite Minwax stain in Jacobean, I stained all the pieces of each spice rack.
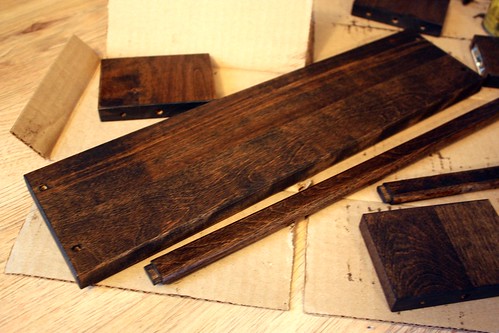
I let the stain stay on a little bit longer than I did with the dining room table because I wanted the colour to be darker and match the kitchen cupboards nicely. Then I wiped it clean with a lint free cloth.
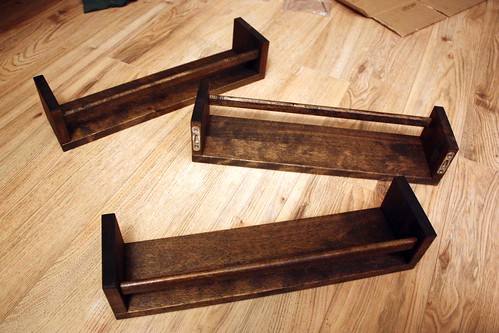
After letting the stain dry overnight, I assembled the spice racks and varnished them with two super thin coats of polyurethane using a really good paint brush. You want this to go on as smooth as possible, but even being careful I found a few small drips I’d missed. If I’d had more time (and if this was something people would see) I’d have sanded between coats and probably applied a third coat as well.

To attach the spice racks to the cupboard, we pre-drilled small holes in the side of the cupboard and screwed in long screws, attaching nuts on the other side. The spice racks rest on the screws so we had to make sure that they were super strong and that there was still a bit of the screw head stuck out for the spice racks to rest on.

While Garrett worked on securing the spice racks, I started going through all the spices to sort out the most used ones (bottom rack) to the least used ones (top rack)
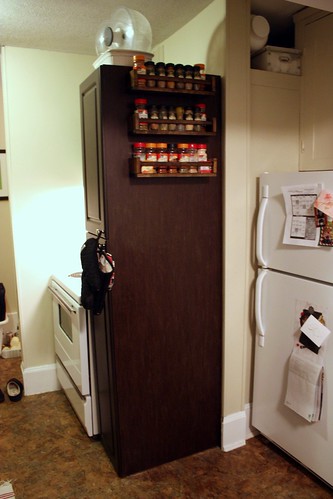
I wish it had been daylight so I could have had a better picture of the spice racks (maybe over the weekend), but so far they look great.

Everything is within easy reach of the stove, counter or table. No more digging through the box of spices!

There is still lots of work to do in this area, including adding a chalkboard and towel rack to the cupboard wall and cleaning up some of the junk we’ve been squirreling away until we could find better storage solutions. The kitchen is really coming along and I can honestly say it feels a thousand times better cooking here than it did in the old kitchen. I love it!

The shelves look great Amanda! When I lived in a rental we were not allowed to do things like that. You must have a nice landlord. I think they are a very useful addition, It is so beautiful here today with a lovely snow. Mel
I love how great it turned out! I found your blog by searching for staining these ikea spice racks. I have a question for you: how did you stain all the sides? Did you do one side, let it dry, and flip it over? Or did you prop it up somehow? I’m having a difficult time deciding how to go about it. Thanks!!
Thanks Sarah! I stained one side and the eyes, then let it dry and did the other side. You could also stain both sides and then prop it up on pins stuck through a piece if styrofoam. I’ve done that before and got good results.