I love binders. Whether it’s for holding my Christmas planner, corralling dog-earred recipes, or organizing my budget, they have so many great uses. However, everyday binders just aren’t that nice to have out in the open on the office shelves.

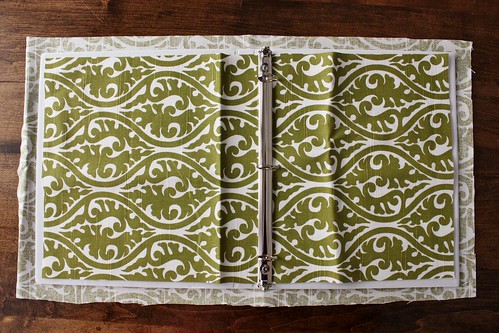
With a little fabric and some glue, you can turn that boring binder into something fun and colourful that fits better with your office decor. I had some extra fabric from when I recovered the dining room chairs last year, and it worked great. It is a nice light canvas from Tonic Living that has held up really well on the chairs, so I know it will stand up to everyday use on these binders.

They sit on the top shelf in my home office, nestled in between my filing boxes and my basket of craft projects I’m working on. It’s easy enough to grab them whenever I need to reference them or add something in. My office is in the dining room, so the fabric is actually a nice tie-in with the fabric on the chairs as well.
What you’ll need:
- Standard Binder (I used a 1″, but you could use any size)
- Fabric (preferably something a little sturdy, like a canvas)
- Spray Adhesive
- Binder Clips
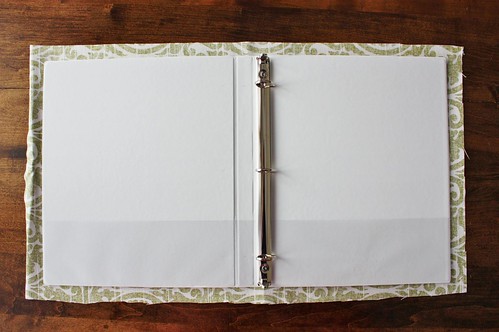
Cut two pieces of fabric for the inside of the binder. They should fit in under the binder rings bar, and be 1/2″ in from the edge of the binder.
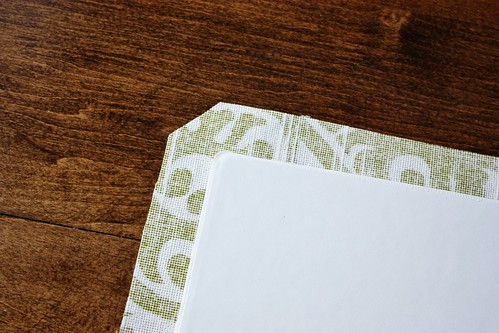
Clip the corner off each corner of the outside piece of fabric. This will eliminate some of the bulk when you glue it on.
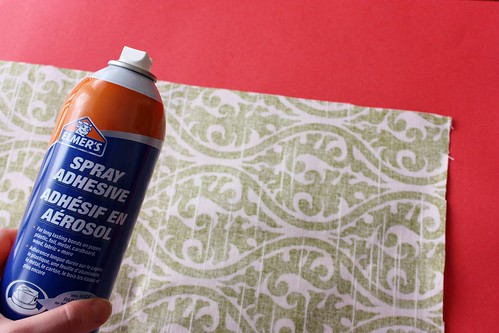
Protect your work area with newspaper, old fabric or a plastic tablecloth. With the right side of the outside fabric down, spray on the spray adhesive, going all the way to the edges.
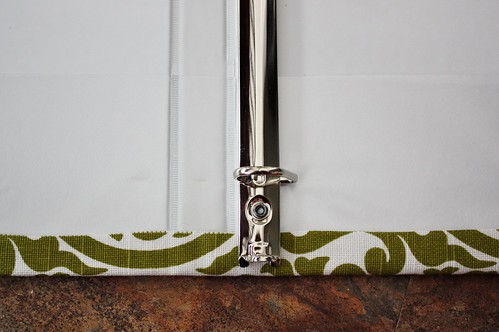
Lay the binder in the center of the sprayed fabric, putting the spine down first, and then the sides. Pull up the bottom edge of fabric and tuck it in under the binder ring bar. Repeat with the top edge of the fabric. Work your way around the edges, pulling the fabric over the edge of the binder and pressing down.
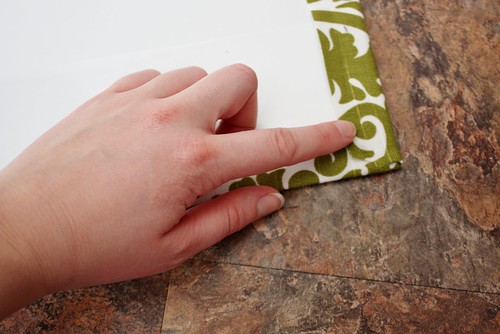
When you get to the corners, press the middle of the corner down onto the binder first and then fold over the sides.
Repeat the spraying method for the inside fabric pieces and apply them to the inside of the binder.
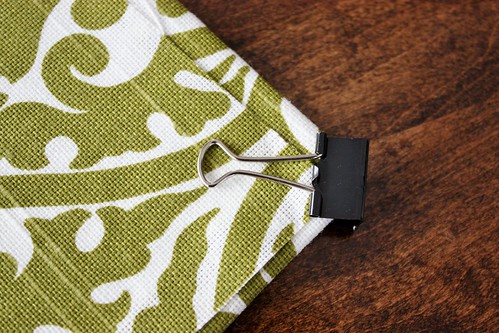
To help the corners glue down, attach binder clips on each corner while the fabric is drying. Let the binder dry completely before you use it.
Spray adhesive can get quite messy. If you get it on your hands, pour a bit of canola oil into your hands and rub them together to remove the stickiness. Wash off with dish soap.


For labels, I used these great permanent file folder labels from the Martha Stewart Home Office collection at Staples.
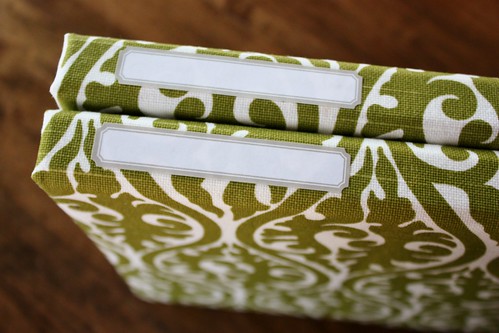
Press the labels onto the spine of the binder. You can write the names on the labels before or after you apply them.
I’ll be posting next week about how I used these binders to help keep my life organized. Having everything right there at you fingers tips makes it much easier to stay on top of things!
– – –
Linked Up To:
Chic on a Shoestring Budget
Crafty Scrappy Happy
Serenity Now
It’s Overflowing

Love how the binder looks with those martha stewart labels & the white boxes (are they the ikea boxes?). Pinning!
– Lora
Thanks Lora! Yes, the white boxes are from IKEA.
Super cute! Love that fabric.
Man, I need to get organized.
😉
Beautiful! I agree with Sarah, I love that fabric! I’ve never used spray adhesive; is it easy to work with? I used fabric to cover some books, but used ModPodge. I’m visiting from It’s Overflowing.
Why have I never though to cover my old binders with fabric?! I used to do it all the time for scrapbooks…hello!? Thanks for the inspiration. 🙂 We’ll be featuring your idea at Someday Crafts tomorrow, so if you have a minute you should come take a look!
LOVE it. I now have plans to do all the binders in the house!
Love this idea! I have so many binders I would have otherwise thrown out, so thank you! Please consider following my blog at http://hoybycrafts.blogspot.com. Thanks!
This is a great idea, but I do have a question. Does the fabric fray at the edges (on the inside pieces), since there are a few exposed raw edges? Or does the adhesive seem to help with this, too? Thanks for sharing such a great idea!