• About
  • Contact
  • Advertise
  • Privacy Policy
  • Copyright & Disclosure
  • Subscribe
    • Bloglovin
    • Facebook
    • Instagram
    • Pinterest
    • YouTube

Life at Cloverhill

  • Main
  • Home & Garden
    • Cloverhill Farmhouse
    • January Declutter Detox
    • Cleaning & Organizing
    • Gardening
    • Our Backyard Chickens
    • Previous Apartments
  • Holidays
    • FREE Online Christmas Planner
    • Holiday Decor
    • Holiday Recipes
    • Holiday Projects
    • Holiday Gift Ideas
    • Holiday Organizing
    • Holiday Activities
  • Recipes
  • Create
    • Printables Vault
    • Everyday Projects
    • Seasonal Projects
  • Family
    • Baby
    • I Do
    • Travel

Craft Tutorial Decor Party Wedding

How to Make A Tissue Paper Pom Pom


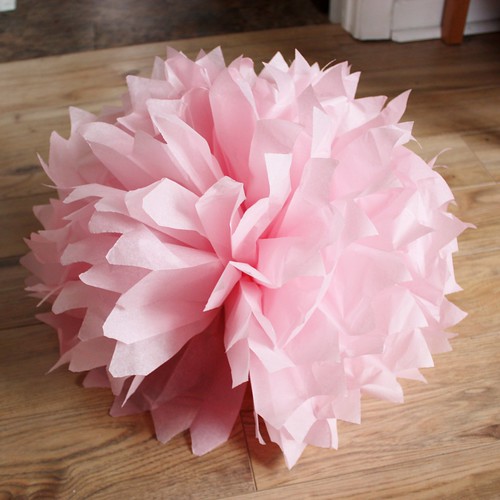
For my friend’s Tea Party Bridal Shower, we wanted to keep the decorations easy-to-make and inexpensive, but to give us a nice little punch of colour. After seeing so many inspirational photos of tissue paper pom poms on Pinterest, I decided to give them a try myself.

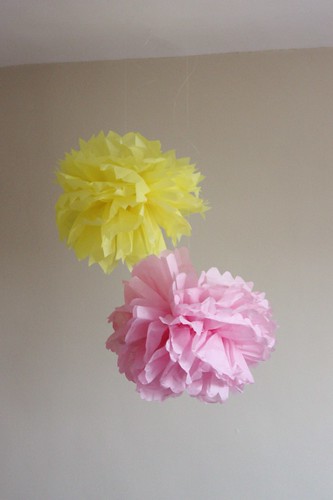
Each one only took a couple of minutes and turned out great, and added a little fun and whimsy to the day. We got 2 large pom poms and 1 small one out of each $1 package of tissue paper from the dollar store.

What you’ll need:

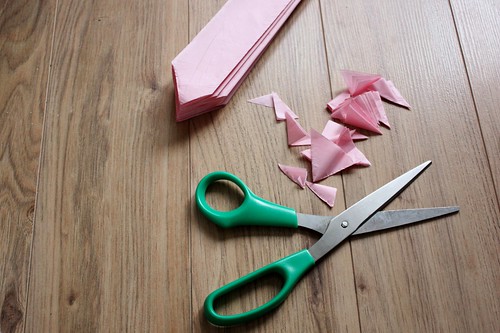
  • Colourful Tissue Paper (8-10 sheets per pom pom)
  • Florist Wire
  • Fishing Line or Invisible Thread (from hanging)
Start by laying out 8-10 sheets of tissue paper.

Fold over the short end by 1-1/2″.

Continue to fold accordion style to the end.

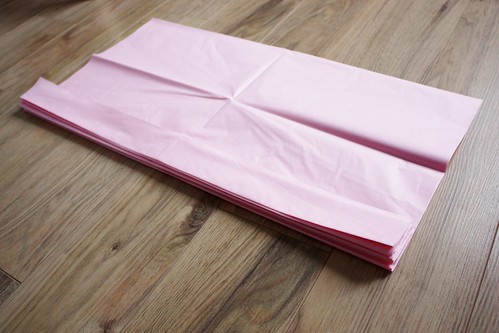
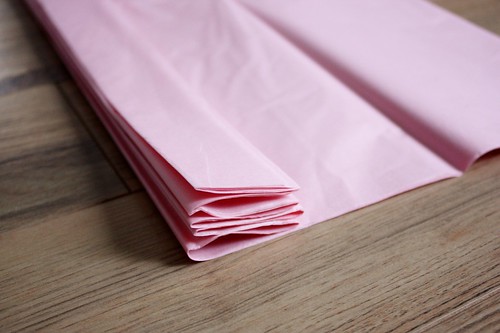
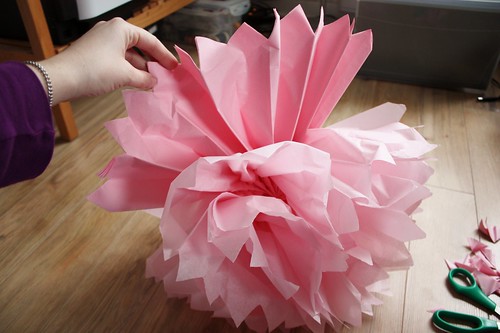
I found that creasing each fold made for the best pom poms.

Once you reach the end, wrap the centre of the stack with a piece of florist wire.

If you cut a bit extra off, you can make a handy little loop on the top. This will make it much easier to hanging up later on.

Using scissors trim each end to either a point or round. Points will make it look more flower like, and a round will make it poofy – it depends on the look that you are going for.
At this point, you can keep the pom poms folded to make them easier to transport to your venue, and just fluff them up when you get there.
Carefully fan out the tissue, and begin to pull each layer apart.

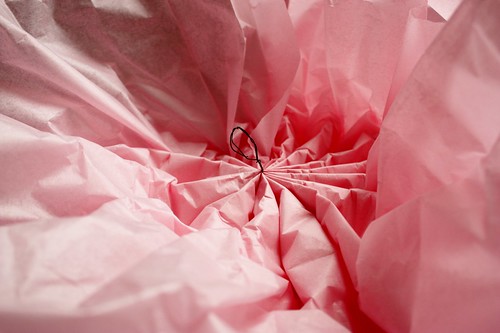
When you get to the last layer, you should still have this flat part in the middle of the top layer, with your wire loop.

Now you’re ready to hang!

We hung them on the ceiling fan above our fruit table in the living room using fishing line.

A couple hanging from the ceiling by the lunch table.

And one on the bride’s head for good measure too!

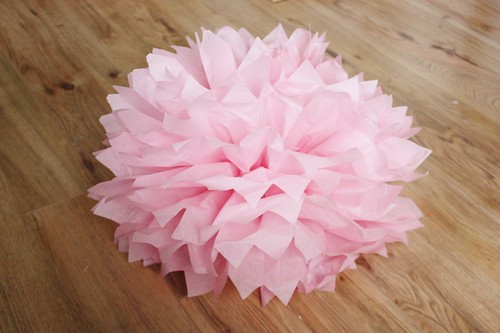
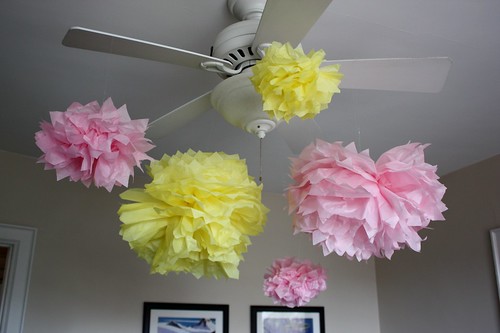
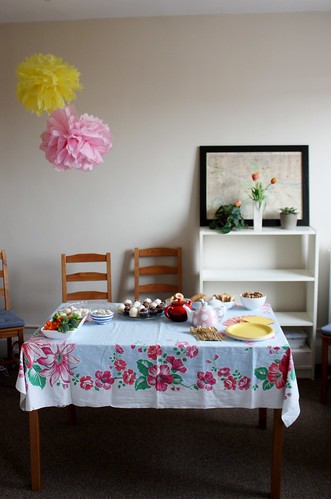
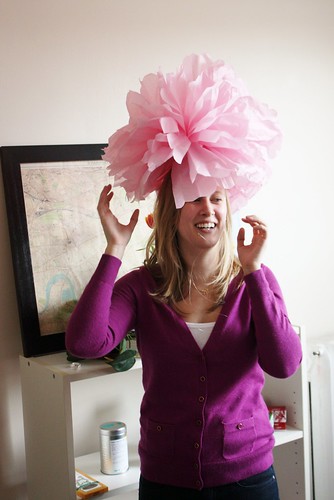
This is a great way to add some fun and whimsy to your next party. Have fun and play around with different colours or even sizes! Try making a half size one, or even really tiny ones as garland or cupcake toppers!

Share this:

  • Click to share on Pinterest (Opens in new window) Pinterest
  • Click to share on X (Opens in new window) X
  • Click to share on Facebook (Opens in new window) Facebook
  • Click to email a link to a friend (Opens in new window) Email

Related


« Tea Party Bridal Shower
Cape Coral Beach, Sanibel Island & Fort Myers Beach »

Comments

  1. ashley @ sunnysideshlee.com says

    March 8, 2013 at 10:25 pm

    What a great tutorial!

Hi, I'm Amanda! Join me as I make my family's 1903 farmhouse into a home. I share renovations, DIY projects, recipes, our flower farm and the joy of living in the Canadian countryside
More About Me

Archives

Categories

Copyright © 2025 · Divine theme by Restored 316

Copyright © 2025 · Divine Theme on Genesis Framework · WordPress · Log in