This past weekend, I headed up to my friend Eve’s cottage for a lovely girls’ weekend. It was a year ago that we all went up there for her bachelorette weekend and had a blast. They are an awesome group of ladies and it was great to get together again and catch up over wine, food, board games (catchphrase!) and crafting. When Eve emailed us all about doing a craft, I knew exactly which one I wanted to suggest.
 Ever since I saw this project on The Pleated Poppy, I’ve wanted to try it. Using overlapping circles, you create a pattern to fill in with paint. It’s like a paint by numbers, but you get to be more creative with colours and pattern.
| Source |
Lindsey also did a demo at Whatever Craft Weekend, which inspired us to do it on our own mini craft weekend.
Have you ever heard of Meg Duerksen’s Whatever Craft Weekend? From the photos that I’ve poured over, it always looks like an incredible weekend full of colour and inspiration. Just reading Meg’s posts makes me want to great creative and add more colour into my life. If you haven’t checked it out yet, I strongly encourage you to head over and visit Meg’s blog. It’s one of my all-time favourites.
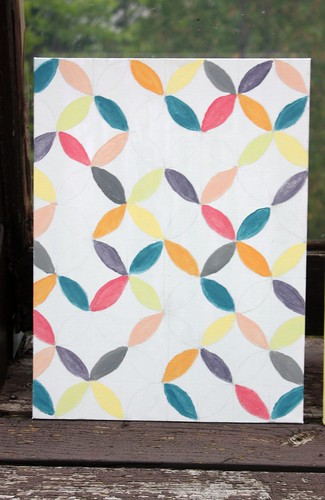
I brought print outs of some of the designs made at Craft Weekend, to give us some inspiration. I love all the vibrant colours and patterns that they created.
| Source |
| Source |
After a great hike through the woods (I have the mosquito bites to prove it!) and a lovely lunch, we all settled in for some crafting!
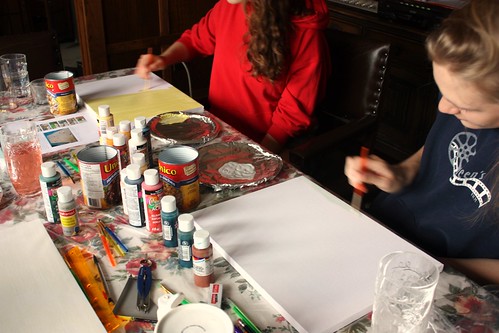 It was the perfect craft for a rainy day at the cottage. We set ourselves up in the dining room, with a drop cloth over the table and some good ol’ 90s music playing in the background.
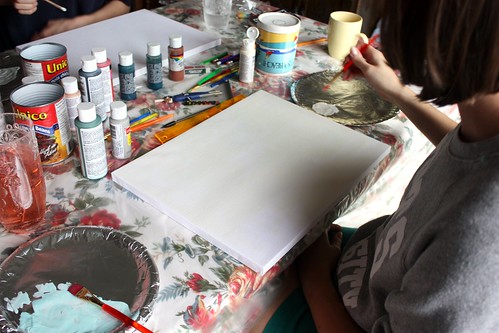 What you’ll need:
- Framed Painting Canvas (We used 12″ x 16″ canvases from the dollar store.)
- Pencil
- Ruler
- White Eraser
- Drinking Glass (for tracing)
- Paint Brushes
- Acrylic Paints
- Plate or Pie Plate (for mixing paint colours)
- Water (for diluting paint and cleaning brushes)
 We started out by painting the background colour of the canvas. I went with a robin’s egg blue diluted with water to create a washed out watercolour look. Light grey, parchment or even white would be great too. Or go crazy and pick a vibrant colour! Makes sure to paint the sides of your canvas as well.
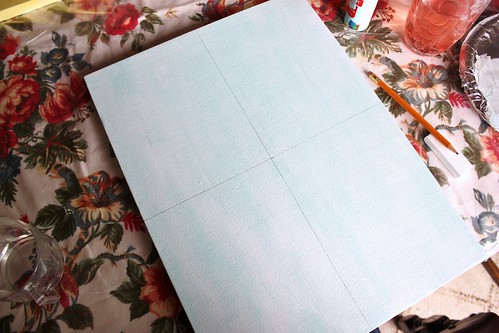 After the canvas was dry, we used a ruler to locate the centre of the canvas and draw the center vertical and horizontal lines.
 Take your drinking glass and measure across the top of it, divide that in half and you have your diameter. My drinking glass was 3 inches wide, which means the lines on my grid were 1.5 inches apart, horizontally and vertically. Work from the centre outward to make your grid.
 We used a drinking glass to make our circles, but a compass and pencil would work too, although you may get some hole marks in the centres. To make your circles overlap and create the “petal” effect, trace a circle and then move your glass up one square and over one square, then trace the next circle. It took all of us a little while to get used to this (and I definitely had to erase a few circles and start over), but once you get the hang of the pattern it gets easier.
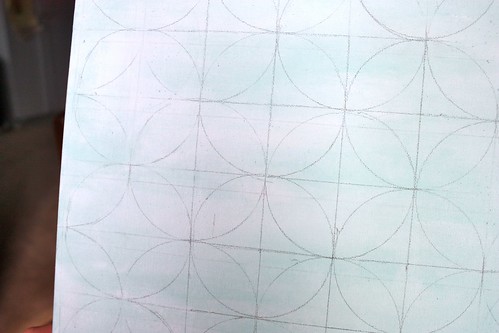 Making your grid and tracing the circles was the most time consuming part of this project, but it was worth it. After you’ve made the petals, you can erase the grid lines in between the petals.
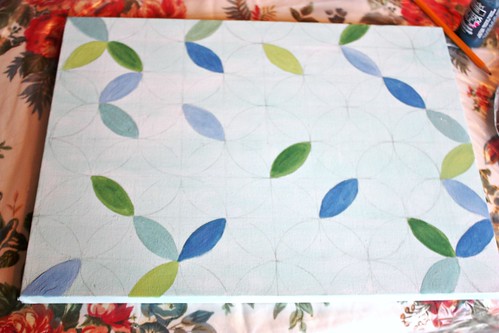 Now you get to paint! I was going for a sort of random look, but its kind of hard to intentionally be random. I used a palette of greens, blues and yellows. I put a bit of each colour on my plate and started mixing them together to create different colour combinations.
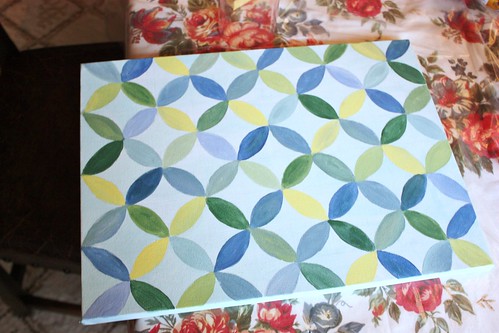 I continued to mix colours and paint all the petals. Some of them I went over with more colours to make it look a little more blended and add some dimension to the petals.
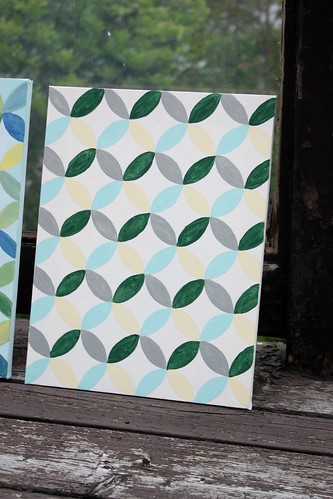
 My colour palette was inspired by the blues and greens of the landscape around us. Can you believe that this is the view from the dining room? Amazing.I’m really pleased with how the colours came out. It fits right in with the little touches of blues and greens I’ve been trying to incorporate in our bedroom, dining room, gallery wall and the living room couch.
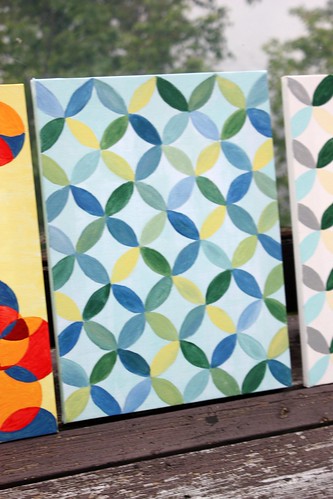
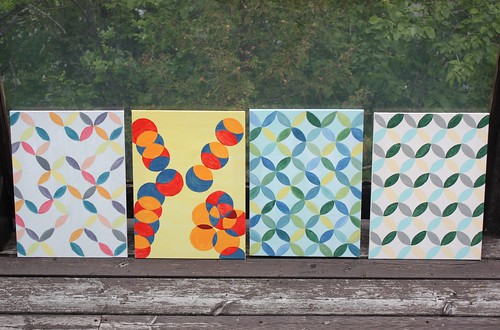 After a couple of hours of painting, we all had these fun canvases to take home. I love that everyone did theirs differently, yet they are all so fresh and fun.
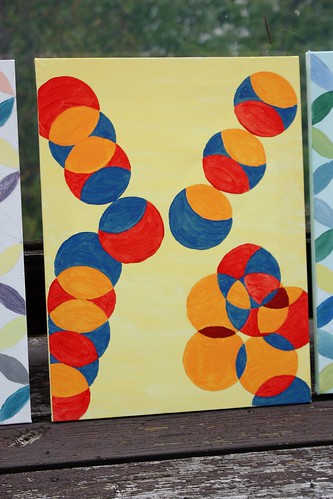
 This was a really fun craft to do together as a group. We were telling stores, laughing and joking around the whole time. This weekend was the great recharge, that I didn’t realize I needed until I got there.
I came home and knocked out two more crafts on my own on Sunday afternoon before I made dinner. I felt inspired to do more and create more. I love that feeling and I attribute it to being around great women with wonderful minds and big ideas. I can’t wait for the next time that we can all get together and get creative!

Oh, I love the ones with all of the bright colors! They would look great in my house.
By the way, I’m giving away a copy of Handmade Walls E-book on my blog right now if you or your followers are interested in entering to win! It has tons of ideas on how to create custom art and frames for your walls. Love it!
http://www.theturquoisehome.com/2013/06/yay-for-500-likes-on-facebook-handmade.html
Hey there! I’ve been following your weblog for some time now and finally got the
bravery to go ahead and give you a shout out from Lubbock Tx!
Just wanted to say keep up the good job!