Last year, I participated in a fun online gift exchange and made Sparkly Clothespin Snowflake Ornaments to mail off to a fellow blogger. It was fun to make something by hand, package it up and mail it out – with the hope that they would open their mailbox and be excited to find a present inside! I know I was when mine came in the mail. This summer I joined Craftaholics Anonymous’ Handmade Gift Exchange and make a cute Lined Tote Bag for my secret gift recipient.
 It seemed like the perfect gift for the summer – it’s just the right size to grab a beach towel and a book, and head to the beach! I loved it so much that I only wish I’d had more fabric to make my own!
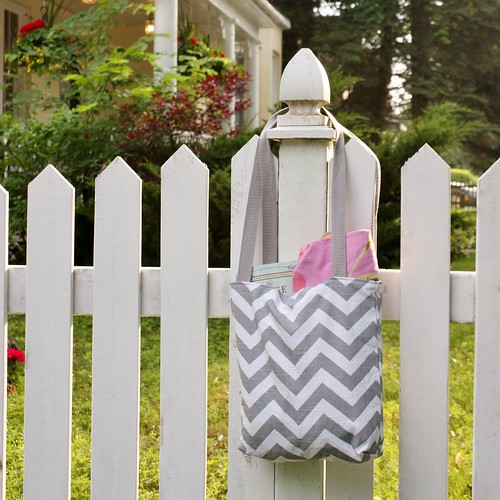
 The outside is made of grey chevron cotton canvas from Tonic Living, with matching grey straps.
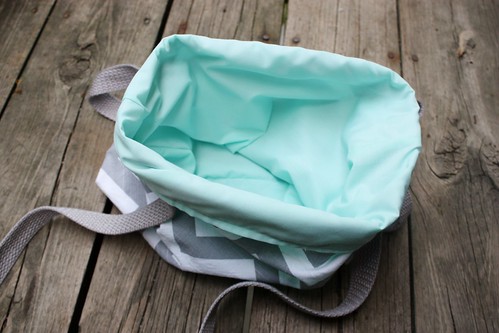 The inside is lined with a soft blue cotton broadcloth.
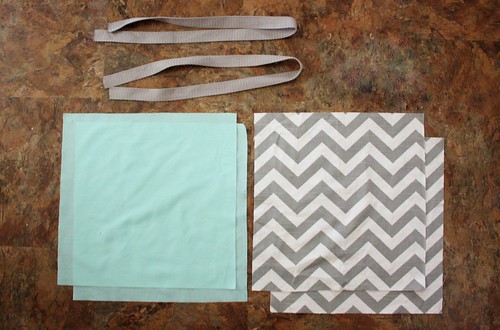 What you’ll need:
- Outside Fabric (thick cotton canvas or twill) – 2 pieces 13.5″ x 14″
- Inner Lining (light cotton or broadcloth) – 2 pieces 13.5″ x 14″
- Cotton straps – 2 pieces that are 30″ long.
 Pin the pieces of outside fabric together, with the good side facing in. Stitch around 3 sides, leaving one of the 13.5″ lengths open for the top. Repeat with the lining fabric.
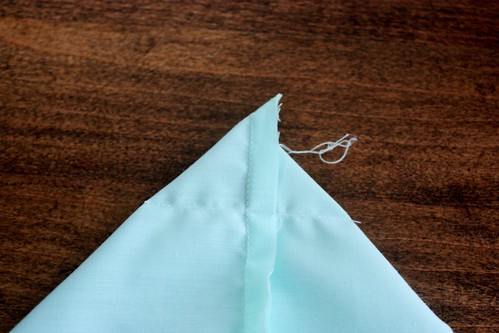 Pinch the bottom corner together and stitch across, 1.5 inches from the top. Repeat with the remaining bottom corners of both bags you’ve made.
 This is what will give the bag it’s boxed corners when it’s done, and create some structure.
 Slide the lining bag into the outer bag, with the good sides of both fabrics facing each other.
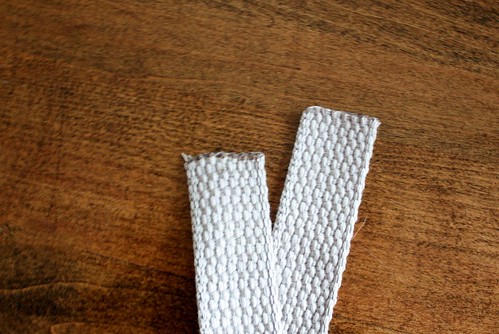 I melted the ends of the cut straps with a lighter before I sewed them in to prevent them from unraveling.
 Slide the straps in between the rights sides of the fabrics, about 2″ away from the sides. Pin in place. Pin the rest of the top edge as well.
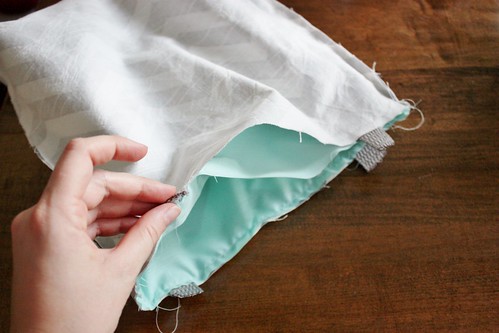 Stitch around the top of the bag, about 1/2″ in from the edge, leaving a 3″ hole on one side to pull the bag through.
 Pull the bag through the opening so that the two good sides are facing outwards now.
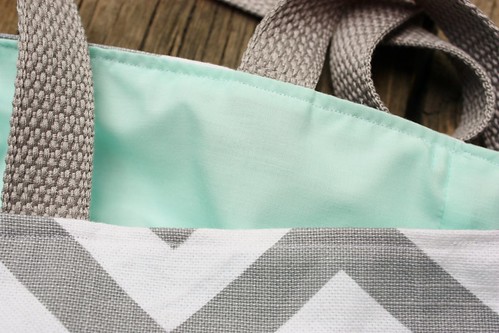 Push the lining inside the bag. Top stitch all the way around the edge of the bag, making sure to fold in the edges as you reach the opening that you used to pull the bag through.
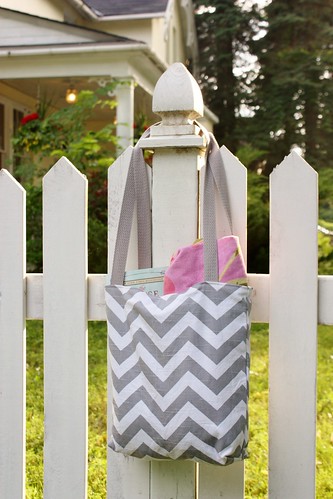 All ready for the beach, cottage or library!
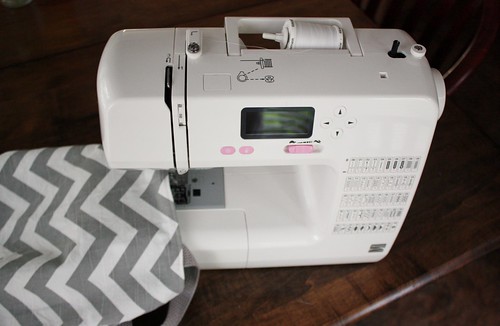 This was the first project that I was able to create using my new digital sewing machine. Thank you to Echoes of Laughter for hosting an awesome giveaway with Sears Canada. This little machine has been getting quite the workout the last few days – mending clothes and whipping up a few blog projects. It is incredibly easy to use and does so many things automatically. I’m inspired to attempt a quilt someday soon!
I think this is the third picture I’ve clicked on hoping that it was the craft sent to me – haha!
Great job and I love the colour combination!
Sweet tote. Pinning! Stop over http://www.sewsweetvintage.com/2013/07/bicycle-basket-up-cycle.html
Very cute tote bag!! I am stopping by from Sugar and Dots linky party.
Here is what I shared this week: http://craftybrooklynarmywife.blogspot.com/2013/06/update-and-es-lounge-pants.html
Adorable! Love the pop of color with the lining! Thanks for linking up at Give Me the Goods Monday! Jenna @ Rain on a Tin Roof
What a fab bag! Really nice fabric selections…the lining looks great, a nice contrast. I have some chevron fabric in my stash waiting to be used
Here’s what I made for my swap partner
http://littleblackduckblog.wordpress.com/2013/07/17/the-reveal-craftaholics-handmade-gift-exchange/
Love this… Just made it, my first project on my first sewing machine using an old quilt cover 🙂 came out brilliantly and was very easy to follow x