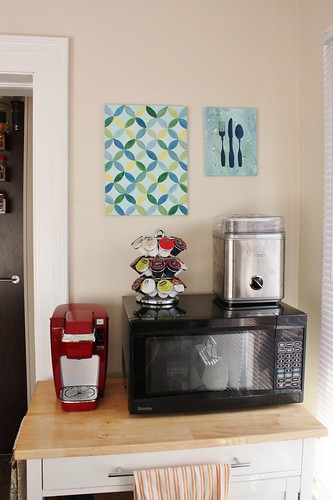
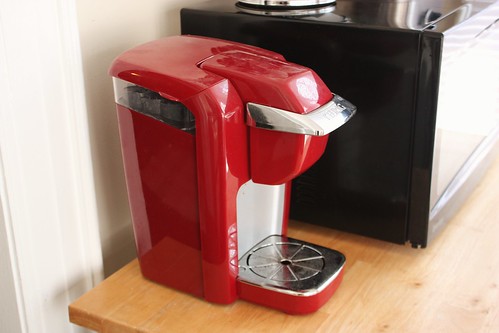
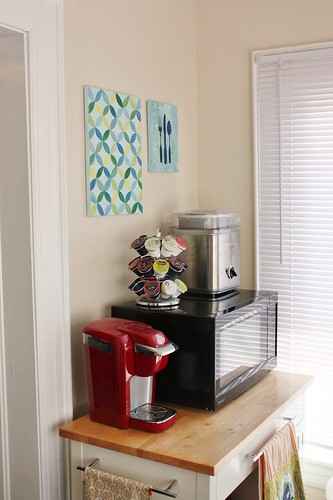
This corner of our dining room is one of the most used areas in our apartment – with the microwave, baking dishes on the shelves below, our pantry in the cabinet, two of my paintings (here and here) and Garrett’s beloved Keurig Mini coffee maker. I don’t drink coffee, so this little machine that his parents’ gave us for Christmas a couple of years ago has been perfect. He can make a quick cup of coffee in the morning without dragging out the french press, measuring the coffee and then dealing with the messy clean up afterwards. We have very few appliances that we use, but this one has been the most convenient for sure. (You’ll spot my favourite appliance up there too – the ice cream machine!)
As convenient as any of the modern one-cup coffee machines are, they do require some regular maintenance and upkeep to make sure they’re in working order. Ideally, you should clean and de-scale (remove the mineral deposits) every 6 months to keep them in good shape. Below is how I keep the Keurig Mini clean and the process is similar for most other machines. Of course, I recommend that you refer to the owner’s manual first to find out how to remove any parts, as well as the proper order to do it. If you don’t still have the manual, you can usually find them online.
What you’ll need:
- white vinegar
- clean toothbrush (perfect use for your old one when you get a new toothbrush!)
- cleaning cloths
- ceramic mug
- dish soap
- fresh water
- good tunes (a requirement for all cleaning projects in my opinion)

Your machine may look all shiny and new on the outside, but a quick peek inside the water reservoir and you’ll find lots of nasty looking mineral deposits.
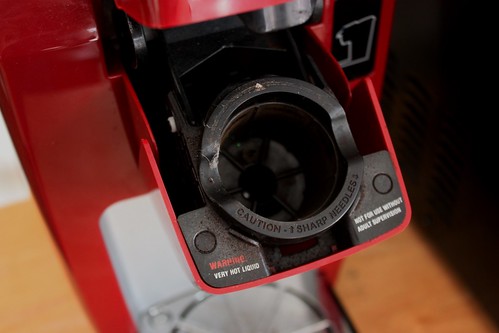
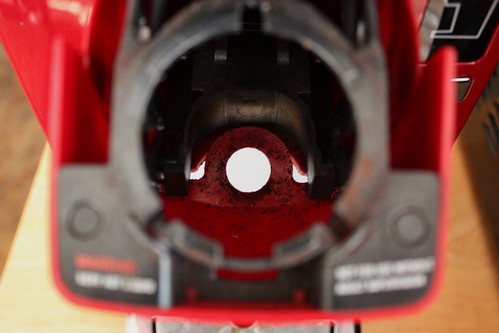
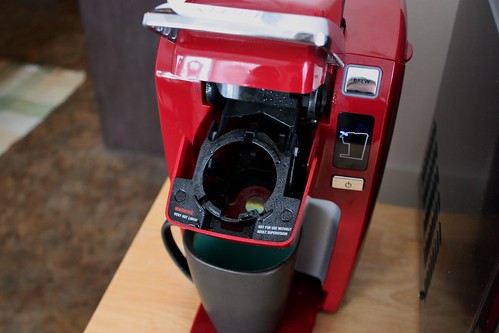
And when you open up the brewer handle, you’ll find coffee grounds all along the sides.

Despite the fact that I wipe down the top of the drip tray whenever I clean the counters, it gets gross pretty quickly.

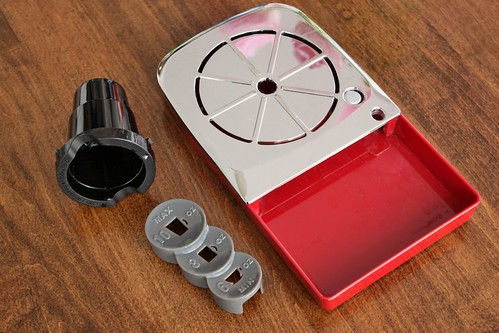
First, remove the water level guide. This will let the vinegar get into all the nooks and crannies of the water reservoir.
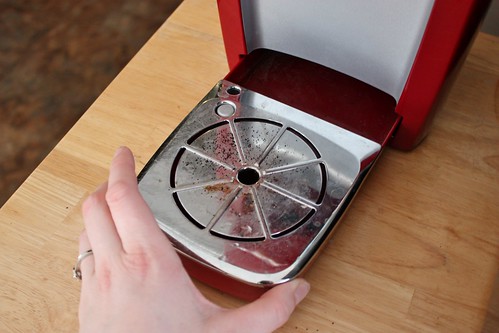
Pull the drip tray out of the bottom of the coffee maker. The top silver part will pop out of the bottom red part making it easier to clean too.
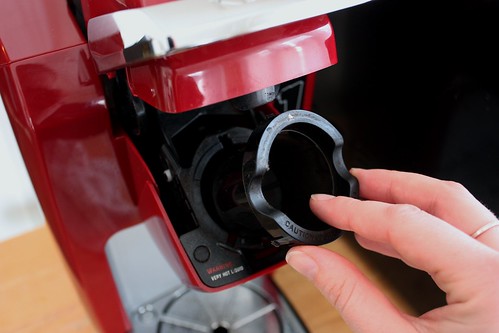
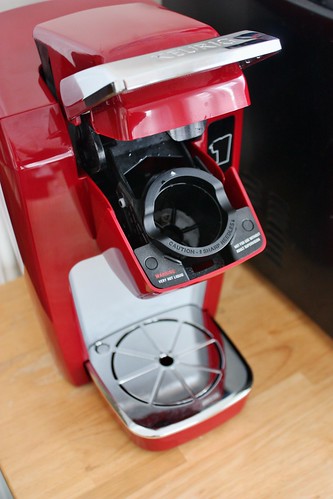
The funnel that the K-cups go into can take a little bit to pop out, but you can do so carefully. Just keep in mind that there is a sharp needle inside the funnel as well as on the top of the brewer handle.
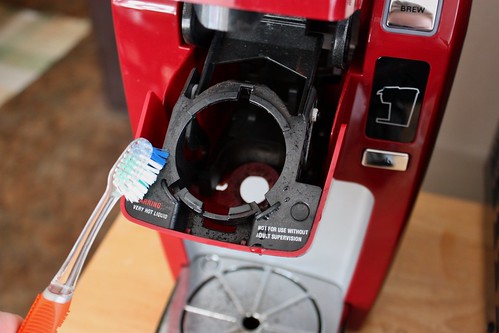
Using a clean toothbrush dipped into white vinegar, gentle brush the coffee grounds off all the components of the brewer handle.
There will also be coffee grounds farther down where the funnel was. Dip a cloth in vinegar and wrap it around the toothbrush. Push it into the funnel hole and gently clean the area.
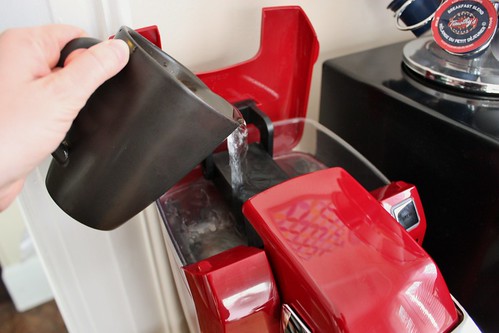
Now it’s time for a descaling rinse! Fill the water reservoir with 10 oz of white vinegar.
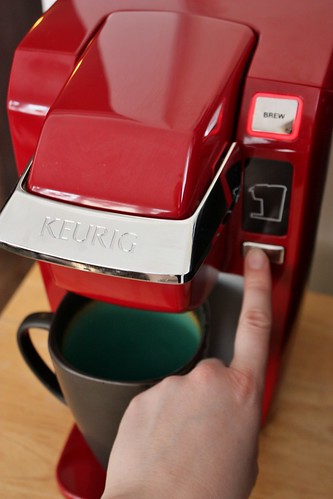
Place a ceramic mug on the drip tray. Lift the brewer handle, but don’t add in a K-cup. After 5 seconds, lower the brewer handle. Press the flashing blue “BREW” button. It will flash red and then turn solid red.
UPDATE: Some readers said that they needed to put the funnel back into the machine to prevent the vinegar from spraying out. I’ve never needed to do this, but you may want to and prevent any unwanted spills on your countertops.
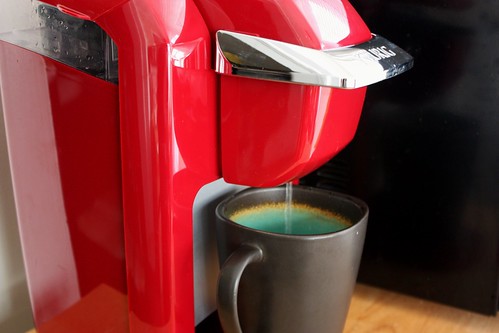
Once the vinegar has gone through the coffee maker, dump the hot liquid into the sink.
Repeat the process again, but this time as soon as the button goes solid red, turn off the coffee maker. Allow it to sit for 30 minutes. Turn the coffee maker back on, lift and lower the brewer handle and press the “BREW” button. Once the hot vinegar comes out, dump it in the sink and rinse the mug.
Meanwhile, while the vinegar was soaking, you could use this time to clean all the loose pieces. I know that some of them are dishwasher safe, but we don’t have one, so I just washed it by hand in hot soapy water. I used the toothbrush to scrub out any mineral build up on the pieces.

Once the second vinegar rinse is done, use the toothbrush to scrub any mineral deposits that still remain. I also used a damp cloth to scrub the sides of the water reservoir and to wipe up any mineral deposits that have been brushed loosed.
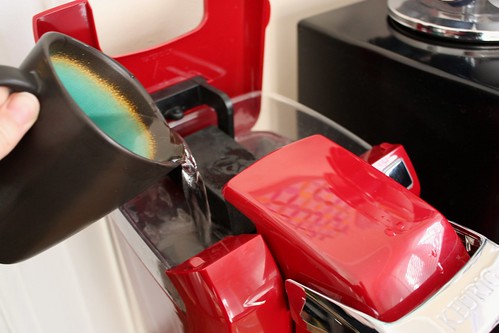
To remove the vinegar smell, fill the water reservoir with 10 oz. of fresh water. Place the ceramic mug on the dip tray, lift and lower the brewer handle and then press the “BREW” button. Toss the hot water into the sink once it goes through. Repeat this process three more times to really cleanse the vinegar out of the coffee machine.

Put the water level guide back into the water reservoir. Just look how clean it is in there!
Put the funnel and drip tray back into place.
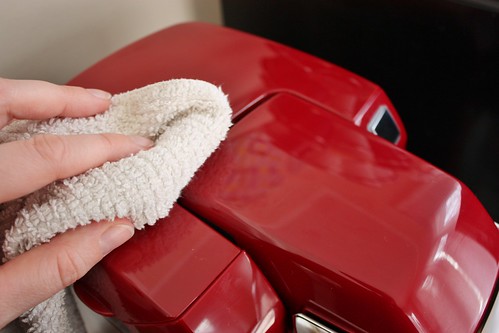
Once everything is assembled again, use a damp cloth to wash the outside of the coffee maker. Buff it with a dry cloth until it shines!
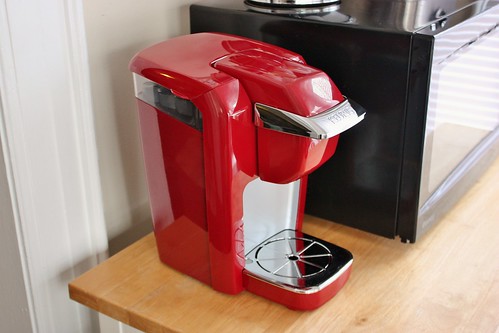
Now you have a clean Keurig coffee maker that is as good as new and all ready to make a fresh cup of coffee.
It may not look like a big difference on the outside, but I like knowing that the next time Garrett makes a cup of coffee it will be fresh and clear of mineral deposits and coffee grounds.

For the vinegar cycle are you supposed to put the funnel back on – I did the 10oz of vinegar and pressed brew and since I didn’t have the funnel in, the vinegar came out spraying everywhere and I needed paper towels to clean it up. In the pictures it does not show the funnel on during this. Did I do something wrong?
I had the same thing happen to me — water all over; kept thinking it was still clogged up. Then I put the filter back in when I ran the last 10 oz. of water. I use filtered well water but I’m now going to use bottled water only!
You should only use distilled water in your keurig, it will keep it clean longer and reduce mineral deposits.
I have a red keruig mini and I use a lot but I think it needs a good cleaning. Please tell me what to do
My college-aged son came home with his Kuerig mini & it hadn’t been cleaned in a year! So I just followed the instructions above (using Jennifer’s comment to replace the funnel) and it is brand spanking new! Super easy to clean. I may just keep this for myself!
Ditto Jennifer. I didn’t put the filter/funnel back in, ended up with hot vinegar all over my counter. For idiots like me, I took all the steps above literally, and didn’t add the filter/funnel back because it didn’t say to do so on the first vinegar cycle. Other than that, this instructions were extremely helpful, thank you posting this.
I’m also pretty literal — I followed directions to a “T” and (naturally) since nothing was mentioned about re-installing the filter, I had vinegar sprayed all over my counters as well– Felt better after reading the comments that we all had this little mis-hap — Anyway, my little Keurig is shiny, bright and ready for another year (HAH!) — Thanks so much for posting directions for this E-Z to follow process!
I’m sorry that you had this experience. I’ve never replace the funnel when I clean our machine and have not had this happen before. I’m wondering if it’s because I use such a high mug? I’ve updated the post for others who may experience this. Thanks for letting me know.
For most up-to-date information you have to
go to see internet and on world-wide-web I found this web page as a best website for latest updates.
On the second cycle where you cut the power off, I suggest turning off the machine right as the vinegar starts to pour out. This way the vinegar gets nice and hot and sits in the line. If you cut it off as soon as the button turns red, the vinegar doesn’t heat up and only sits in the reservoir. I also leave the spout installed so the coffee residue can be cleaned out of the needle. It usually proves more effective.
wonderful clear explanation Many Thanks – a shame Keurig cvouldn’t have done it but I’m glad you did
thanks, so glad I found you!
Thank you so much for giving this information. This is amazing My 5 years old sun will be do that easily.
Really appreciate….
This is such a helpful post! As we live many people together we are using the coffee machine a couple of times per day. It definitely needs a deep cleaning and I will try your way!!
Double use for the hot vinegar. Put some baking soda down your drains first. Then pore the hot vinegar down the drains. Now you have cleaned your drains & pipes. Finally, pore the hot water down to rinse them. E- friendly way to keep everything clean.
Excellent recipe. I did everything as instructed. As we were warned in the beginning that the vinegar would splash the counter, I placed a bigger bowl and had no problem. Thank you for taking the time to explain everything in detail. Your text is much better than the manufacturer’s instructions.
Thanks for this!. Question: I am having trouble popping the silver part of the drop tray back into the rest of the drip tray. Can anyone troubleshoot me through this? Thanks again.
G. Hylland
I had the same problem this a.m. of not being able to put the silver part of the cleanup tray in.
Pulling the entire tray (black part) out, you can easily put the silver top on. Slide it back in.
I was trying to put the slotted silver top in the machine with the black part of the tray still inside
the machine. Hope this helped you.
Hi AMANDA! Your blog is really impressive. I was searching cuisinart coffee maker cleaning procedure. But I find you. I liked you detailed post. Do you have plan to write a cuisinart coffee machine cleaning guide?
Thanks in Advance!
Have a Good Day!
Thanks! Unfortunately I don’t have that coffee machine to try and make a guide. With any appliance, I find that a cycle of vinegar works best, followed by a few clear water cycles to flush it out. Good luck!
this wasn’t a sponsored post. I just happened to love it when I used the one in our vacation rental. ? Maybe try reaching out to Hamilton Beach directly?
Great tips, thanks for the pictures it really helped!
With thanks for sharing your great webpage
Great tip to follow. The first cycle also started to spray but I held the cup up to the dispense area and it was fine.
If I use vinegar will that leave the taste and smell of it in my coffee maker? Has anyone tried this? I read elsewhere that you can also use lemon juice and baking soda instead of vinegar.
As I mentioned in the post, you do multiple rinses of water through the reservoir after the vinegar to get it all out of the system. As long as you do that step, you won’t taste any vinegar.
Nice site Amanda, I have a Black K15 recently cleaned it, will do the method in a couple of weeks.
I do like Steve’s suggestion about shutting it off as soon as the vinegar starts to drip on the second round, letting the hose get a soak.
Saw this at Keurig’s site, a tip on draining any leftover water, this probably being from the hose. For the k15, keep it plugged in but shut it off. Put a cup under the spout, leave the k-cup holder empty. With the unit turned off, raise the lever as if you had filled the reservoir then lower it. Press the brew button until the Brewer just spouts out air. Not much water at all comes out, but I was surprised to see this and glad to be able to empty this after making coffee.
HI MEET AMANDA,
The step by step guide of you is just amazing. I’m using a french press for made coffee, So I need your tips for how to clean it and how can I maintain it very well for a long time.
This is an amazing site of cleaning a coffee maker. Now I can clean my coffee maker so easily. It helps me a lot.
Great info about the cleaning of keurig and other coffee machines. Thank you for sharing this article. Such quality content always helps the people getting valuable knowledge. I would like to mention that I have shared useful tips and info for cleaning of coffee makers in the mentioned site.
Such a helpful post! It undoubtedly needs proper cleaning. I will try to follow your instruction.
I was having trouble cleaning my coffee maker. Your hacks and creative ways of cleaning coffeemakers sportless are genius ideas.
I often clean the external part of Keurig once a week or more frequently, if it gets dire. Now, It seems like it’s not at all hard to clean the internal parts also. This step-by -step guide is really helpful to keep it bacteria-free.
Vinegar works really good. I would like to mention that to get the vinegar taste out of keurig completely, using baking soda is a good one ,just to make sure its extra clean.
My Kurig looks just like this but it doesn’t have the grey circle water indicators .