• About
  • Contact
  • Advertise
  • Privacy Policy
  • Copyright & Disclosure
  • Subscribe
    • Bloglovin
    • Facebook
    • Instagram
    • Pinterest
    • YouTube

Life at Cloverhill

  • Main
  • Home & Garden
    • Cloverhill Farmhouse
    • January Declutter Detox
    • Cleaning & Organizing
    • Gardening
    • Our Backyard Chickens
    • Previous Apartments
  • Holidays
    • FREE Online Christmas Planner
    • Holiday Decor
    • Holiday Recipes
    • Holiday Projects
    • Holiday Gift Ideas
    • Holiday Organizing
    • Holiday Activities
  • Recipes
  • Create
    • Printables Vault
    • Everyday Projects
    • Seasonal Projects
  • Family
    • Baby
    • I Do
    • Travel

Behr Paint Projects Decor DIY Dogs Organizing Painting

DIY Window Seat Storage Bench {Behr Paint – New Year, New Look}

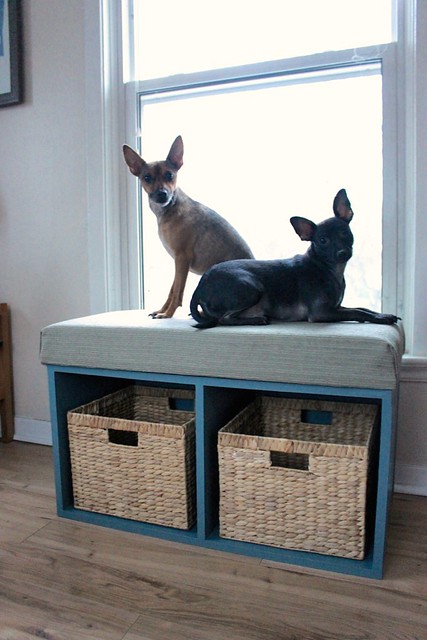
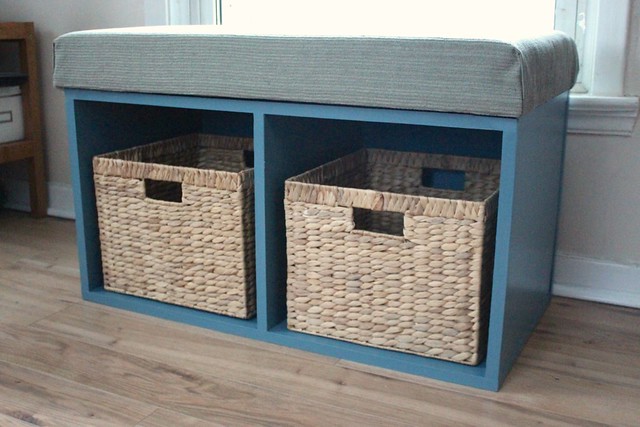
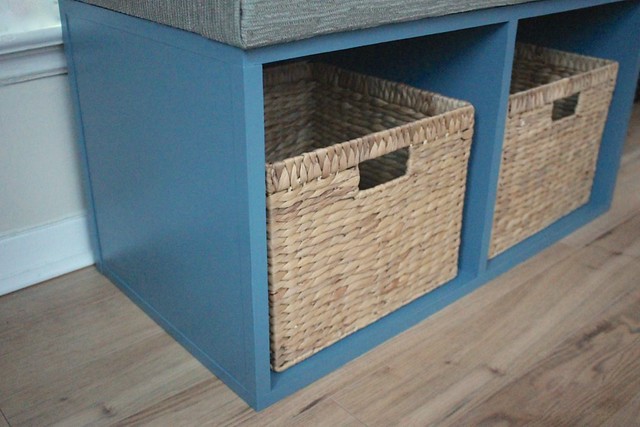
Over the weekend Garrett and I got working on a project that had been on our minds for some time. We’ve been looking for a bench that would give the dogs a window seat to look out at the street below and give us some much needed storage. When we couldn’t find anything that fit the bill we decided to take the plunge and build it ourselves.

diy-window-seat-storage-bench
Ok, so you know how usually you go into a DIY project and you anticipate that something is going to go wrong or a measurement will be off or you forget something crucial at the store…none of that happened this time. We kept looking over at each other with these dumbfound faces saying “it really can’t be this easy”. Every time Garrett said that out loud I warned him it was jinxing us, but it never happened. This is hands down the easiest project that we’ve done together…and it made us excited about more projects to come in 2015.

behr-paint-new-year-new-colors
The drive to get the bench done this month came about when Behr Paint challenged the Behr DIY Experts to take on a project that we didn’t accomplish in 2014 or that we were excited to do in the New Year, using the 2015 Color Trends. The moment I read this, Garrett and I knew this was the perfect time to get our butts in gear and make the window seat a reality.

Psst – Behr Paint is also hosting a fun Pinterest contest right now where one winner will receive a $500 VISA gift card! To enter pin your favourite trend-inspired look (like maybe this project right here!) on Pinterest before Tuesday, January 27th, 2015. Then, copy and paste the link of the pin to this Facebook contest page and enter your information.

Ok, so I’m going to back up to earlier this year when we first noticed the need for something at the window. I was cleaning up the apartment and stacked the dogs’ beds on top of some boxes by the windows, while I washed the floor and came across this little scene. Two cozy little pooches, hanging out and watching the world go by. At first I thought it was a fluke…

…but then I caught them doing it again and again. Any time we had a box, a chair or even a basket of blankets by the window, there was a dog on it.

It became clear that our little guys really liked looking out this window (and thankfully didn’t bark very often while doing so), and the idea of a real window seat was born.


diy-window-seat-storage-bench
I measured out the window to see how wide we could go and how high we wanted it, so that the dogs could see out over the ledge. In the end we decided on 31″ across, 16-1/4″ inches deep at the top and 20″ tall with the cushion.

I knew I wanted to use this piece to add a little more colour and drama to our living room (which is otherwise beige, beige, beige). That’s when Behr Paint’s Blue Clay from the 2015 Color Trends caught my eye. It was a great moody colour with some real depth to it.

diy-window-seat-storage-bench
Then I was able to find light grey-green upholstery fabric for a steal ($4/meter!) to go with it and some seagrass baskets that I’ve had for a while.

For the wood we went with maple plywood. A 4 ft x 8 ft piece was $55, but it gave us everything we needed for this project and leftover pieces for other projects as well. I was able to draw out the cuts we needed to maximize the pieces leftover…

We went to Home Depot to pick up the wood and I’ve found that if you go when it isn’t too busy, they are usually nice about not charging for extra cuts (the first two are free). They especially like it if you come with all your cuts drawn out on paper already, instead of trying to do the math in your head on the spot! In the end we only needed ten cuts to get the pieces we needed and even if we had to pay $8 extra it would have been worth it to have it done there, and come home with all our pieces ready to go.

drilling-pilot-holes
I marked the screw holes about 3/8″ in from the sides and Garrett drilled in pilot holes at each spot.

The top piece and bottom piece were the same, with three holes for each side piece and then another three for the middle piece.

I held the side and middle pieces in place, while Garrett continued to drill the pilot holes into those as well.

power-drill
Drilling pilot holes really helps to limit twisting or splitting the wood. For screws we went with drywall screws to make sure everything was secure.

Once the base, sides, middle and top were in place, we added the back piece on and screwed it in four spots. These are the only screws holes that could possibly have been seen once the piece was assembled and they’re only on the back. I filled them in with a little wood putty and allowed it to dry before sanding.

natural-edge-veneer-edging
For the edges, my dad told us about this great preglued wood veneer edging. At first I was skeptical, but it ended up working really well.

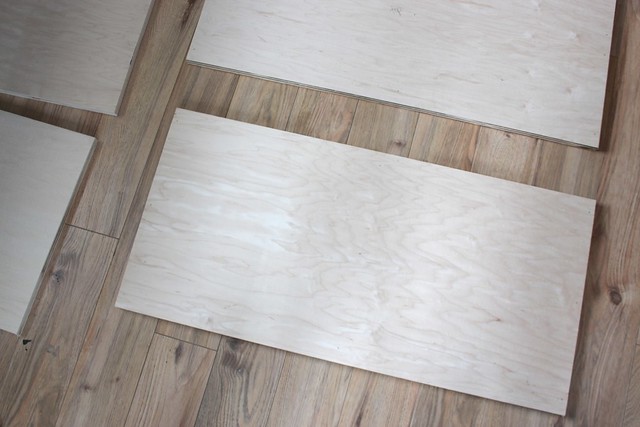
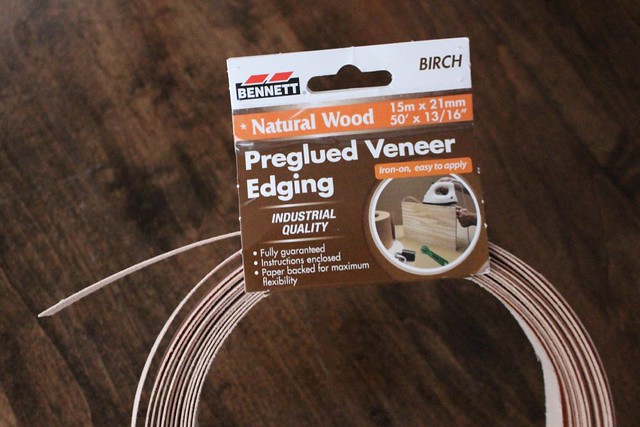
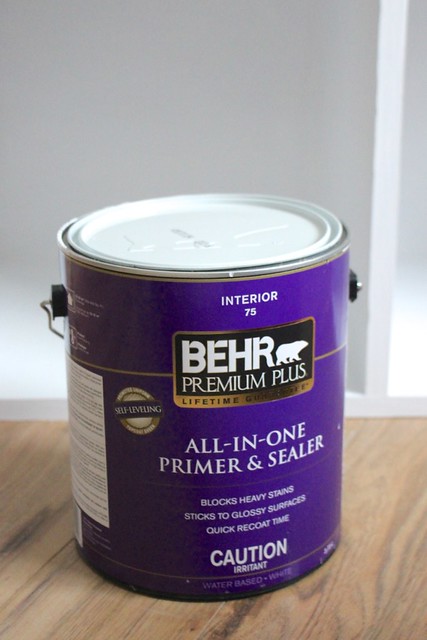
The wood side is very realistic and I could see why it would work so well with staining too.

I used it to cover all the exposed edges and to add a little extra trim along the sides too (you can see it on the sides in the finished product).

The application was really simple. Using a regular household iron (on cotton setting with no steam), you press the veneer onto the edge, moving along every few seconds. Once it had dried, I took a utility knife and trimmed all the excess off. I then took my sander with fine sand paper and lightly sanded all the edges to make sure there were no small pieces to get splinters (definitely picked a few of those out of my hand before catching on).

behr-paint-primer
I used a clean cloth to wipe any sawdust off and that got to work with the primer. It was really starting to look like a piece of furniture now!

behr-paint-primer
For primer, I went with Behr’s Premium Plus All-In-One Primer and Sealer. This stuff is the real deal. The adhesion was awesome and it completely covered everything in one quick coat. I let it dry overnight and then got ready for the next step…

diy-window-seat-storage-bench
…colour!!! I picked Behr Marquee in Blue Clay in a satin finish. Even though Blue Clay and the rest of the 2015 Color Trends are not part of the Behr Marquee Color Collection (and thus the one-coat coverage guarantee does not apply), the paint went on perfectly in one coat using a brush. I painted the bottom first, let it dry for a couple of hours and then propped it up on boards to do all the other sides.

Meanwhile, we got started working on the cushion. We went with 3″ upholstery foam that my dad had in his shop. If I can’t find something, I always call my dad first. He usually has it. In fact, when I asked him if I could borrow a staple gun for this project he opened a cupboard with no less than five in there, of various models. Some may call it hoarding, but I call it resourceful! (just kidding, Dad!)

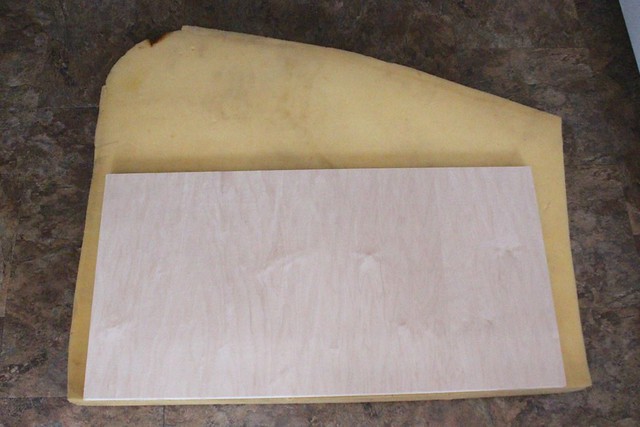
We laid the board for the cushion base on top of the foam and used a marker to trace along the edges.

electric-carving-knife
To cut the foam, we actually got to use one of our Christmas gifts – an electric carving knife! Not only does this thing slice turkey like nobody’s business, it’s also the best tool for cutting styrofoam or cushion foam.

cutting-foam-electric-knife

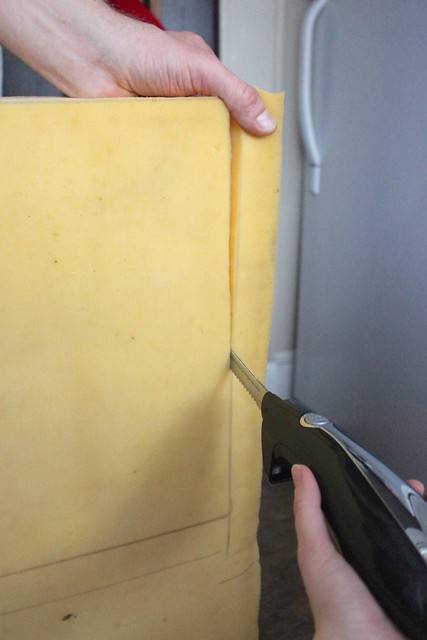
 Garrett held it steady, while I carefully cut along the lines.

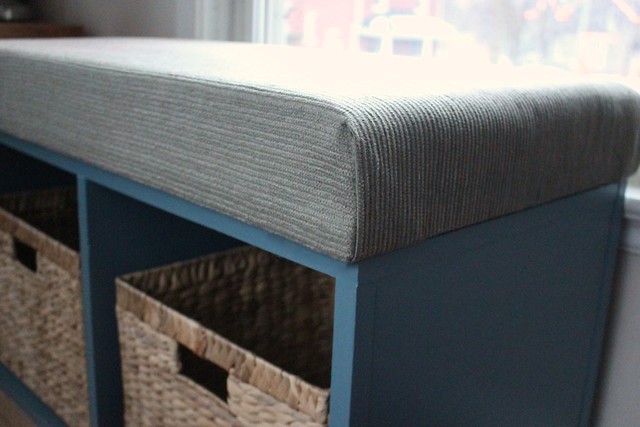
It fit perfectly when we were done!

staple-gun-upholstery

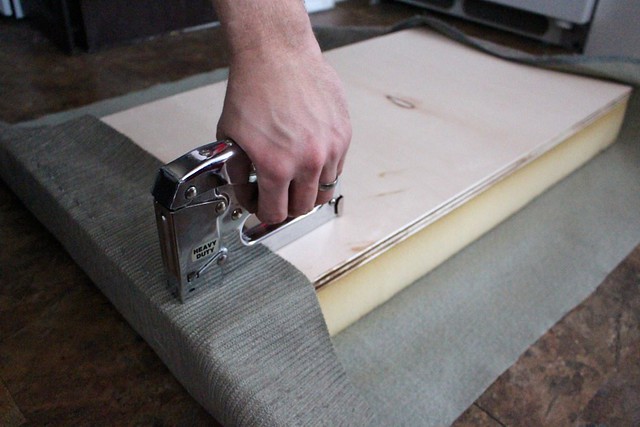
We placed the upholstery fabric with the good side down, then the foam on top of that, followed by the board. If your fabric is thick like this upholstery, you should be okay, but for thinner fabric, I suggest doing a layer of batting first. Holding the fabric taut, we went around and stapled it on.

folded-corner-cushion
For the corners, we folded the ends in like you would a squared corner of a bed and stapled it in place.

To attach the cushion base to the top of the bench, we drilled two 1-1/4″ screws from underneath the top piece, into the cushion base. Each piece of wood is 3/4″ thick, so it would go just through the top piece, into the cushion base, without any risk of the screw end poking through.

For the base of the storage bench and the bottoms of the baskets, I put felt furniture protection pads (those little felt stick-on circles) to prevent any scratches. I still can’t get over how easy this project was – totally doable in a weekend! After that it was just a matter of letting the pooches take it for a test drive.

diy-storage-bench-window-seat

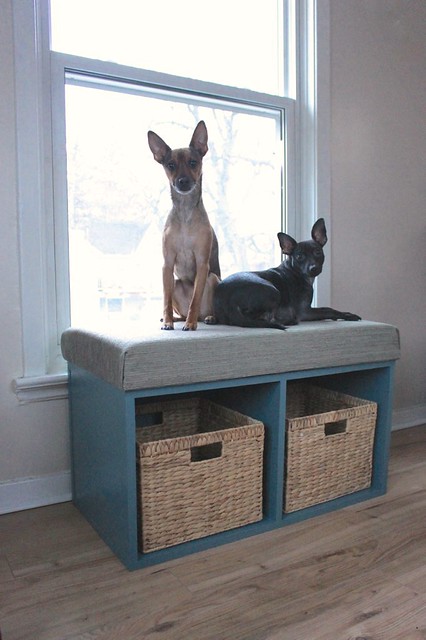
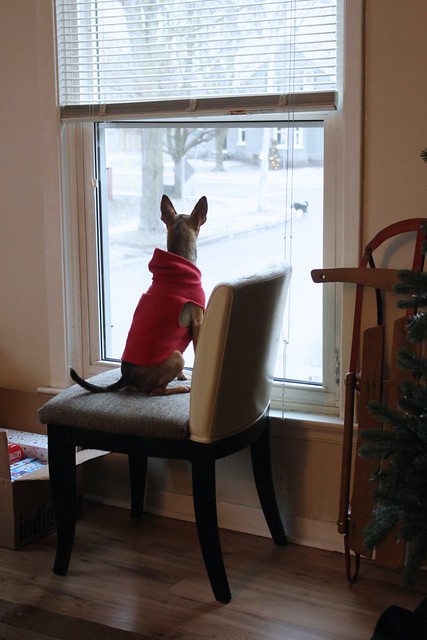
They jumped on it right away and settled in for some squirrel watching.

cute-small-dogs
So far it’s become their favourite little lookout, and I love that it gives us some extra seating when we have company too. That is, if we can get the dogs to share.

Be sure to take some time to check out some of the amazing projects from my fellow Behr DIY Experts. – there are some truly awesome and inspiring projects here that are sure to get you in the mood for a fun project to kick off 2015! And don’t forget to stop by the Facebook contest page for your chance to win a $500 VISA gift card!

behr-paint-diy-experts-new-year-new-colors

DIY Key and Mail Holder by Elizabeth at Frugal Mom Eh!

Console Table in Blue Clay by Robin at All Things Heart and Home

The Cs’ Bathroom Refresh by Abby at Just a Girl and Her Blog

Small Entryway Makeover and Decorative Shelf with Hooks by Christine at The DIY Dreamer

Moody Built-In Shelves by Kim at NewlyWoodwards

Girls’ Bathroom Sneak Peek by Mandy at Sugar Bee Crafts

/  /  /

Disclosure: I am a member of the Behr DIY Expert program and was provided Behr product for this project. All opinions and ideas are 100% my own.

Share this:

  • Click to share on Pinterest (Opens in new window) Pinterest
  • Click to share on X (Opens in new window) X
  • Click to share on Facebook (Opens in new window) Facebook
  • Click to email a link to a friend (Opens in new window) Email

Related


« Cheesy Chicken Broccoli Rice Skillet
10 Ways to Get Stuff Done TODAY to Feel More Organized »

Comments

  1. Christine says

    January 20, 2015 at 6:33 am

    Amanda!! I’m oh so loving the DIY Window Seat Storage!!! Can I have it? hehe I bet your pups won’t part with it now. BEHR’s Blue Clay is such a fun shade, I have it too.. but I haven’t used it yet.

  2. Andrea Juhasz-Hazadi says

    January 20, 2015 at 7:22 am

    They are so nice dogs ♥
    The project is awesome 🙂 Well done!

  3. Robin says

    January 20, 2015 at 7:29 am

    Perfect project!!! Great tutorial and I LOVE Blue Clay! 🙂 (also, I’m in love w/ the pups!) xo

  4. Lor says

    January 20, 2015 at 12:30 pm

    I absolutely LOVE window seats! I tried to make a “homemade one” for my bedroom and ones for the kitchen where the cats could sit and look outside too (didn’t turn out nearly as lovely as yours). Such a great idea though, great job!!

  5. Elizabeth L says

    January 20, 2015 at 2:57 pm

    Cute! I love that colour, its so pretty!

  6. Kim@NewlyWoodwards says

    January 20, 2015 at 4:22 pm

    Hurray for projects that go smoothly. It pretty much never happens for us, either.

    This looks awesome! I love that it fits your window perfectly and the pop of color is great.

  7. chelsea jacobs says

    January 22, 2015 at 12:24 pm

    Love the color you chose!

  8. Darria says

    February 13, 2015 at 10:52 am

    Great work! I am really impressed! The seat storage is gorgeous! Thank for sharing! Greetings, Storage New Malden Ltd.

Trackbacks

  1. Friday Fun: Updates from Ladies’ Night, A New Blog Domain & A Quiet House | Lovely & Cozy ♥ says:
    January 30, 2015 at 9:52 am

    […] (If you wanna see a legit homemade window-seat, complete with a handy storage area, check out Amanda’s she put together on her blog for her two dogs; it’s […]

  2. 26 DIY Storage Bench Ideas | Guide Patterns says:
    August 5, 2015 at 12:19 pm

    […] DIY Window Seat Storage Bench […]

  3. DIY Window Perch for Your Pet | Designs & Ideas on Dornob says:
    January 28, 2016 at 6:46 pm

    […] We haven’t forgotten about you, dog people! A homemade window seat with built-in storage lets your pups have their day in the sun without ruining the furniture. High-quality plywood and a DIY cushion keep this project affordable, while the bright paint job and seagrass baskets elevate the look past Home Woodworking 101. The pattern can be found here. […]

Hi, I'm Amanda! Join me as I make my family's 1903 farmhouse into a home. I share renovations, DIY projects, recipes, our flower farm and the joy of living in the Canadian countryside
More About Me

Archives

Categories

Copyright © 2025 · Divine theme by Restored 316

Copyright © 2025 · Divine Theme on Genesis Framework · WordPress · Log in