• About
  • Contact
  • Advertise
  • Privacy Policy
  • Copyright & Disclosure
  • Subscribe
    • Bloglovin
    • Facebook
    • Instagram
    • Pinterest
    • YouTube

Life at Cloverhill

  • Main
  • Home & Garden
    • Cloverhill Farmhouse
    • January Declutter Detox
    • Cleaning & Organizing
    • Gardening
    • Our Backyard Chickens
    • Previous Apartments
  • Holidays
    • FREE Online Christmas Planner
    • Holiday Decor
    • Holiday Recipes
    • Holiday Projects
    • Holiday Gift Ideas
    • Holiday Organizing
    • Holiday Activities
  • Recipes
  • Create
    • Printables Vault
    • Everyday Projects
    • Seasonal Projects
  • Family
    • Baby
    • I Do
    • Travel

Christmas Craft Tutorial Holidays

Eco-Friendly Holiday Cards & Tags

Making your own holiday cards is an easy, eco-friendly, economical and fun craft to do this year. All you need are some used holiday cards, colourful card stock, a simple glue stick and interesting scissors and punches.

This is a simple card made with an image of chickadees cut from a used Christmas card, glued to a piece of  metallic card stock that was black on one side and green on the other. I used pinking shears to create the edge on just the front, so that the black would show through.

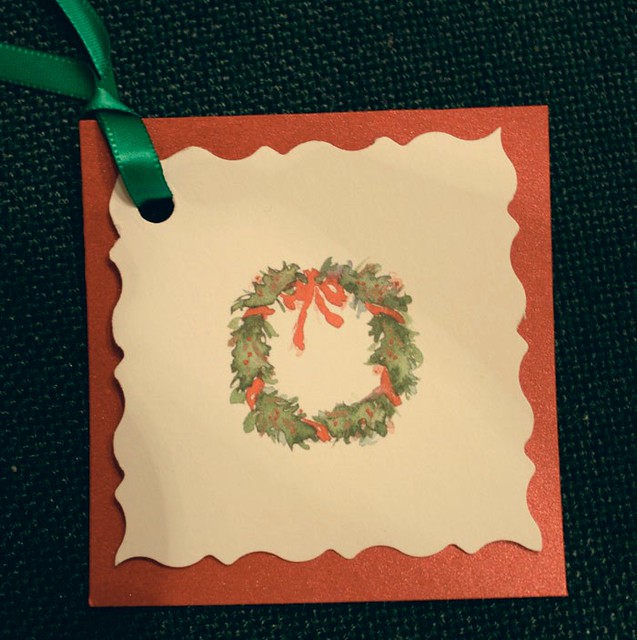
This little wreath is actually a small image from the back of a used Christmas card, that was the perfect size for a gift tag. I didn’t glue the image to the red card stock, because I want to write the message inside. You can then reuse the tags another year by just replacing the card stock.

For years my mother has been keeping the Christmas cards we receive and packing them away with the decorations.

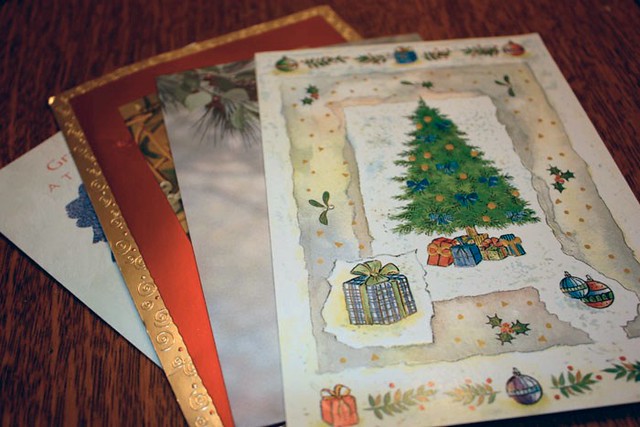
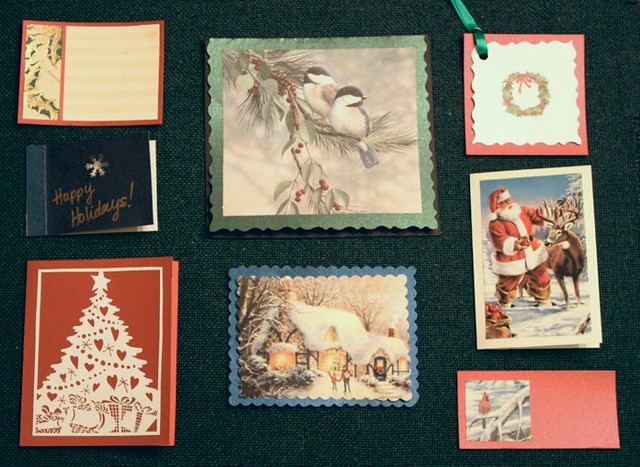
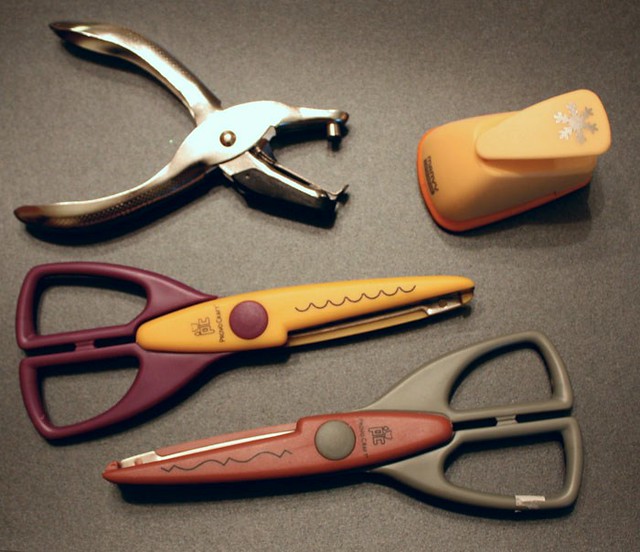
I went through and selected those that had any images or patterns that caught my eye. Larger shapes will make great cards, and smaller ones are perfect for tags.
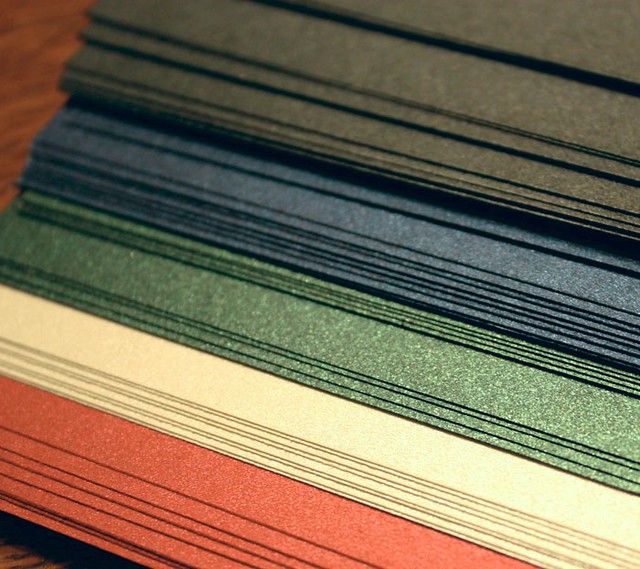
This metallic card stock comes in multiple colours and is really festive. The gem tones are easy to match to most Christmas cards and are a great weight to work with (not to thick, but not to flimsy). A pack of 50 sheets is about $10 at Michael’s and will give you enough to make plenty of cards and tags all year round.

The variety of pinking shears and punches out there is incredible. These were picked up at Michael’s in the scrapbooking section. I’ve never done any scrapbooking, but walking through that aisle, it was incredible to see the range of supplies and ideas that are out there. The hole punch on the left can be used to make holes for the ribbon to go through, or to make a unique design along the edge. The pinking shears are scalloped (top) and Victorian (bottom), which stray away from your typical zigzag pinking shears. The punch in the top right hand corner is my favorite…it’s a snowflake! Its perfect for not only using as a design, but even as a fun hole for the ribbon to go through.

You can easily cut the shapes out with scissors, but if you have one of these Fiskar Paper Trimmers, or know someone that you can borrow one from, they are fantastic. It makes very clean cuts, and the ruler makes it foolproof to make perfect angles, and frame the images that you have cut from cards.

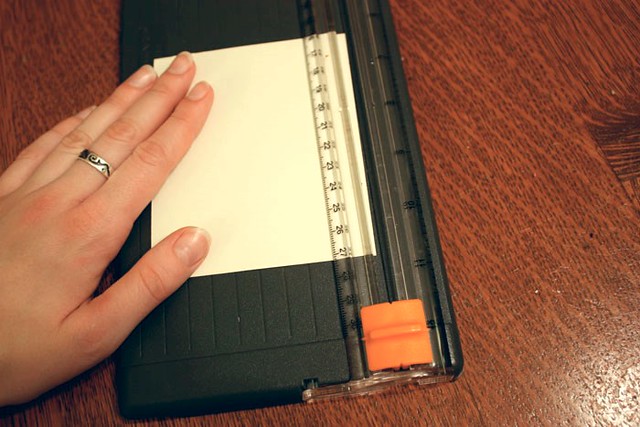
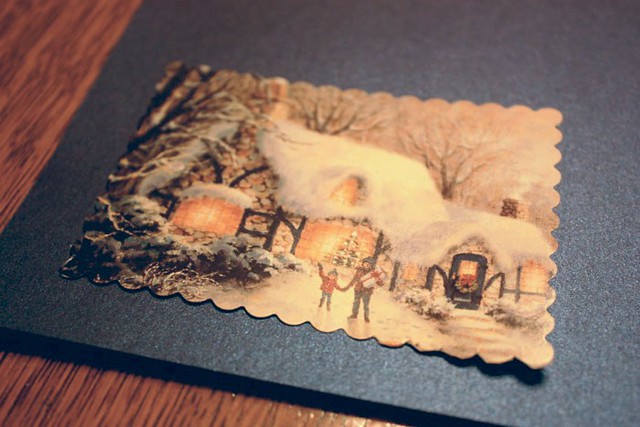
On this card, I cut a scene out with the scalloped pinking shears, and now I am lining it up on the metallic paper to size the card. I love framing this snowy winter scene with the dark midnight blue, and I know just the person I want to give this to.
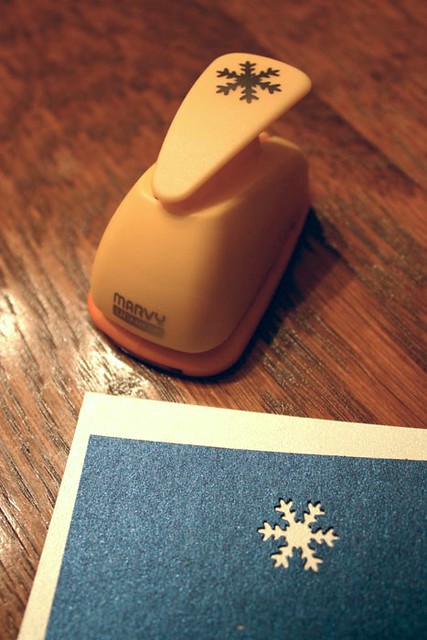
The snowflake punch is great with the midnight blue and shimmering ivory white card stock. Punching the shape out of one coloured paper and layering it on a contrasting paper, creates an interesting more modern tag.

This dark paper is great, because you can take a metallic pen (like this gold one) and write personal messages and greetings on the cards and tags.

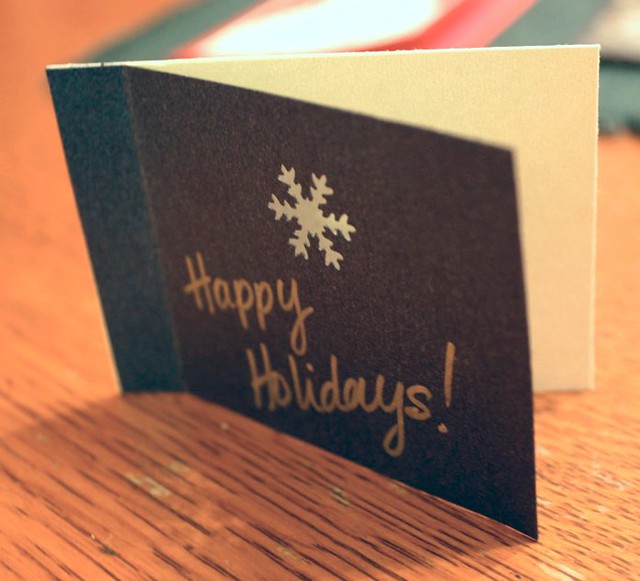
To finish the card off, I scored about 1/4″ in from the edge on one side of the midnight blue card stock, and then used a glue stick to adhere it to the white cardstock. Its a great little card for a gift, that took only 2 minutes to make, and was a lot of fun.
Making your own cards and tags is a simple and easy craft that you can even do with the kids to create their own tags for gifts (Just remember to use safety scissors! No one needs to go to the ER at this time of year.) The possibilities are endless with what you can do with the leftover cards, and what about birthday cards? thank you cards? get well soon cards? Get creative and have some fun with it!

Share this:

  • Click to share on Pinterest (Opens in new window) Pinterest
  • Click to share on X (Opens in new window) X
  • Click to share on Facebook (Opens in new window) Facebook
  • Click to email a link to a friend (Opens in new window) Email

Related


« The Pumpkin Toss
Sit, Boy, Sit »

Comments

  1. Working Mommy says

    November 30, 2009 at 3:27 pm

    I love using old Christmas cards to make new ones!! You can even make ornaments out of some. I will have to put up a lesson on that one…stay tuned!!

    ~Working Mommy
    Come on by, stay for a while and leave a comment or two!

  2. sandy says

    November 30, 2009 at 6:17 pm

    What a fabulous idea! They are lovely!

    Stopping by to welcome you to SITS! It’s great to have you in the SITStahood!

Hi, I'm Amanda! Join me as I make my family's 1903 farmhouse into a home. I share renovations, DIY projects, recipes, our flower farm and the joy of living in the Canadian countryside
More About Me

Archives

Categories

Copyright © 2025 · Divine theme by Restored 316

Copyright © 2025 · Divine Theme on Genesis Framework · WordPress · Log in