It’s that time again for The Pinterest Challenge Winter Edition from Young House Love, Bower Power, The Great Indoors and Hi Sugarplum. I loved making the Wine Glass Lanterns in the Fall Edition, so I knew this was the perfect kick in the butt that I needed to get another project done.

This all started a couple of months ago, when my parents dropped off their doberman, Shadow, for us to dogsit for a few days. It was her first time coming to the apartment, but we figured she’d do okay with her best buddy Whiskey around.

During the 15 minutes between the time that Garrett left for the gym and I was getting home from the grocery store, she managed to destroy the front hall blind. I guess she was just nervous with all the unfamiliar noises on our street, but I have to say I could have killed her when I found this, if I didn’t feel so bad for her.

Needless to say the blind was beyond repair. I’d thought about just replacing it, but then I starting looking on Pinterest and found some interesting ideas on how to fix this problem.

What if I turned the mini blind into a roman blind?

I found some great tutorials on Pinterest that showed how you could keep some of the hardware and add some fun fabric.
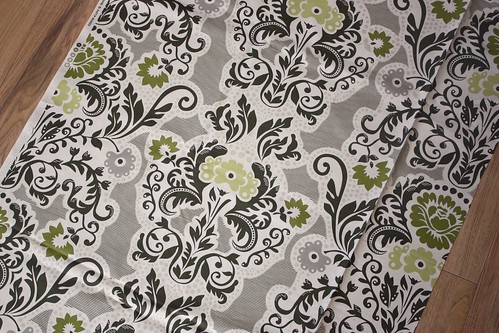
I already had this great fabric I bought on clearance from Tonic Living (love their fabric selection). It was perfect for livening up the front hall and I’d already paid for it for another project, so it felt like this was free (at least that’s what I tell myself Garrett).
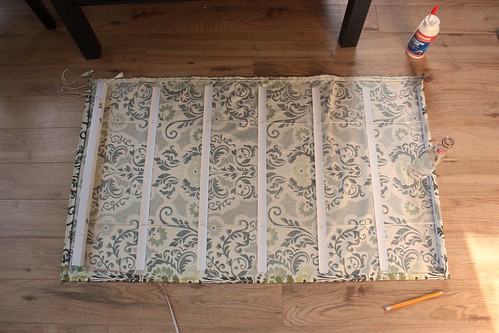
I cut the fabric to the dimensions I wanted, hemmed all the sides and then adjusted the blind length, removing extra slats, as the tutorial mentioned. I kept the distance between the slats 6-1/2 inches apart, with a little extra fabric on the ends to fill in the rest of the window frame. I used extra strength white glue to adhere the fabric to the slats, top piece and bottom piece.
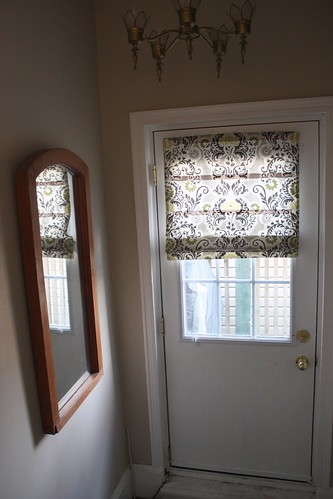
And here is the finished product! I love it! Maybe I should thank Shadow for forcing me to change this up, because now it looks even better than it did with the mini blinds. It gives some more colour and dimension to an otherwise neglected area of the apartment.
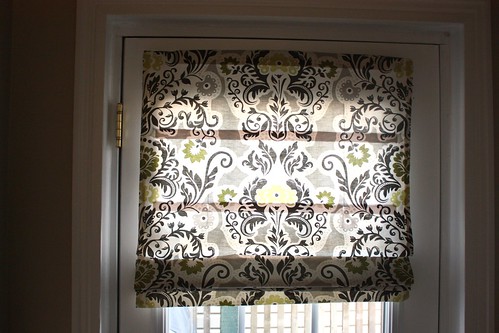
The fabric looks great with the paint colour, and brings in some of the olive colours from the newly recovered dining room chairs around the corner.

It also gives us some privacy when we want it, while still letting in light. But I’ll make sure to keep it up high next time Shadow comes for a visit, that’s for sure.

Looks awesome! I’ve always been sort of intimidated to try these but you made it look simple enough!
Thanks! It takes a little time, but I think it was worth the outcome 🙂
Awesome job! I need to make myself ones of these for my bathroom.
* Visiting from YHL
What an improvement! I love it, and the fabric choice is fab!! (Also here from YHL!)
Oh my goodness! This is brilliant! It looks great and makes so much sense. I may have to try this in my kitchen. Thanks for sharing!
Anna
This is so on my list to do! I love yours! It turned out fantastic!!
Wow, I love this idea. It’s beautiful, and you make it look so easy. I’m visiting from YHL, too.
Ah, fantastic! PS-That dog looks terrifying. Maybe Sherry can borrow him as her heavy for her next Dude Get On With It challenge?? Every challenge needs a good bouncer, especially if they’re sweethearts…well, at heart. 🙂
Hahaha, great idea! The dog is actually a really big suck and gets spooked easily. Not the big tough guard dog that people thinks she is. My little chihuahua is actually the top dog when these two are out in the yard together, so look out for him.
Gorgeous, I love the fabric you chose.
Oh and your parents dog looks like the one of the tough dogs from ‘Up’ 🙂
Movies seem to always have dobermans as the big tough dog and they look like it for sure, but every one that I had growing up was really just a big 70 lb lap dog that gets scared of its own shadow. My little 11 lb chihuahua is tougher than that big baby, but she puts on a good show and scares away intruders anyways.
Brilliant! Thanks for the great tutorial too! I would love for you to share with my readers on Blog Stalking Thursday!
http://thecraftyblogstalker.blogspot.com/2012/03/blog-stalking-thursday-32.html
I’d love to do one of these in our master bathroom, but haven’t decided on what fabric to use. Isn’t that always the hold up?!
Great job, and thanks for linking up with the Winter Pinterest Challenge!
Erin @ The Great Indoors
I love it! The roman shade looks wonderful in your window.
Thanks! I love it so much more now that there is a little bit of colour in the front hall!
Thank you! Going to attempt this for our in-progress nursery, maybe adding some blackout fabric into the mix to (hopefully) keep baby sleeping longer stretches.
Visiting from YHL!
Congrats on the new addition to your family!
You could easily add black out fabric to this by stitching your nicer fabric on top of the black out fabric first, then hem together and glue it to the blinds.
All picture are looking thanks for share on this blog.
Large number of people focus on mini blinds information like these.
love the burlap/linen mini roman shades if you find a good source I’d love to know i want those for my kitchen! hope all is well!
What did you use to attach the fabric to the blind?
I used an extra strength white glue from the hardware store.